
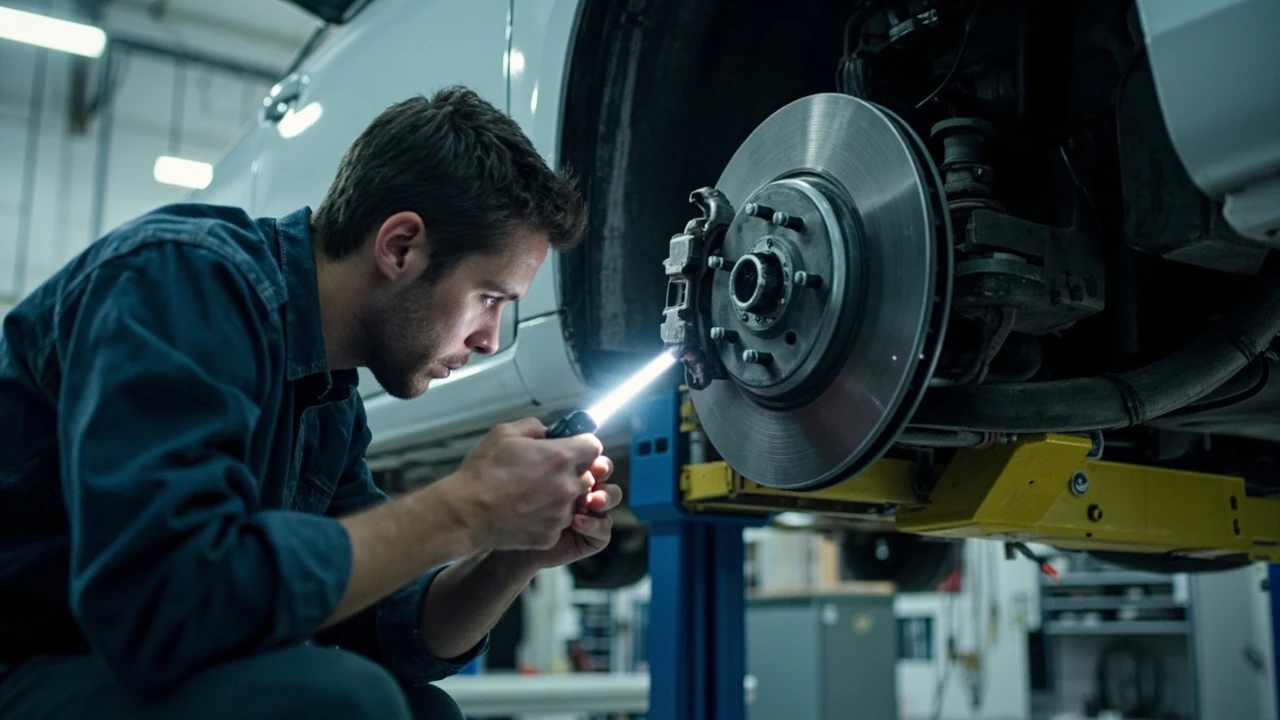
Free brake inspection: what it actually covers and when to book one
A grinding noise on a Tuesday commute, a soft pedal on a wet morning, or a dashboard warning light that flickers at low speed are the usual reasons drivers start searching for a free brake inspection. The pitch is simple: a shop looks at the braking system at no charge, you leave with a written list of what is healthy and what is wearing out, and you decide later whether to spend any money. In practice, the value depends on what the technician actually checks, how long the appointment lasts, and whether the shop separates the inspection from any repair work that may follow.
This guide explains what a typical free brake inspection includes, what it usually does not include, how long it should take, and how to read the results so you can make a clear decision. It also covers when a free check is enough and when you should pay for a deeper diagnostic instead. The goal is to help you walk into a shop with the right expectations and walk out with information you can actually use.
What a free brake inspection usually covers
Inspection checklists vary by shop, but most free checks focus on the same core components because those are the parts that account for the majority of brake problems. A typical appointment includes the items below.
- Brake pad thickness: measured through the wheel or with the wheel removed, compared against the minimum safe thickness for that vehicle.
- Rotor or disc condition: visual check for hot spots, scoring, rust, thickness variation, and minimum thickness spec.
- Caliper function: slide pins, pistons, and guide hardware checked for sticking or uneven movement.
- Brake fluid: level in the master cylinder reservoir, plus a basic visual check for color and contamination.
- Brake lines and hoses: signs of cracking, swelling, leaks, or corrosion, especially at fittings and along flexible sections.
- Parking brake: cable travel, adjustment, and rear caliper or drum function where applicable.
- Test drive or stationary brake check: pedal feel, pull to one side, noise, and ABS warning behavior.
- Dashboard warning lights: scan for brake system, ABS, and traction control codes if the shop has a scan tool available.
Many chains describe their process in detail. For example, Firestone’s published overview of a free brake inspection walkthrough describes a test drive, a visual inspection under the hood, and a strip test on the brake fluid to check for contamination. That kind of step-by-step approach is a reasonable benchmark when you compare what other shops offer at no charge.
What a free brake inspection typically does not include
The phrase “free” can hide a few practical limits. Knowing what is usually outside the scope of a no-cost check helps you avoid surprises when the estimate arrives.
- Wheel removal on all four corners: some shops only pull the front wheels unless you authorize further work, so rear pads and rear rotors may only get a visual look through the wheel.
- Detailed rotor measurement: a precise micrometer reading of rotor thickness and runout usually happens only when a brake job is scheduled.
- Brake fluid replacement: a strip test tells the technician whether the fluid is contaminated, but flushing the system is a separate paid service.
- ABS module diagnostics: a basic code scan may be free, but deep electrical diagnostics on wheel speed sensors or the hydraulic control unit often is not.
- Repairs of any kind: the inspection itself is free, but parts and labor for pads, rotors, calipers, or lines are quoted separately.
- Written specifications report: you may get a checklist, but not always a printed comparison of measured values against the manufacturer’s minimum specs.
None of this is a trick. Most shops are upfront about scope. The issue is that drivers sometimes expect a free check to answer every question, when in reality it is a screening step. If the technician finds something borderline, the next step is usually a paid, more detailed look.
How long a free brake inspection should take
Time is a useful quality signal. A thorough visual inspection and test drive on a standard passenger car usually takes 20 to 45 minutes, depending on whether the wheels come off and how busy the shop is. If the appointment is finished in under 10 minutes, the technician may have only checked the pad thickness through the wheel and skipped the rest.
| Inspection type | Typical duration | What usually happens |
|---|---|---|
| Drive-through visual check | 5 to 10 minutes | Wheels stay on, pad thickness estimated, fluid level glanced at, no test drive |
| Standard free inspection | 20 to 45 minutes | Test drive, under-hood visual check, fluid test, pad measurement, written findings |
| Detailed paid inspection | 1 to 2 hours | Wheels removed, rotors measured with a micrometer, full report with measured values |
| Diagnostic for ABS or warning light | 1 to 2 hours | Scan tool hookup, live data review, possible road test with scan tool connected |
A quick check is not necessarily a bad check. If you have no symptoms and only want a baseline, a short visual look at pad thickness and fluid level may be enough. If you are hearing noise, feeling vibration, or seeing a warning light, allow enough time for a proper test drive and a wheel-off look at the affected corner.
When a free brake inspection is the right call
The most useful situations for a no-cost check are also the ones where the value of early detection is high. The list below covers the cases where booking an appointment is usually a smart use of time.
- Routine schedule: pads and rotors are wear items, and a yearly look is a reasonable habit for most drivers who commute regularly.
- Buying a used car: before you sign paperwork, an independent brake check can confirm whether the previous owner left you with thin pads or a soft line.
- After a long trip: a tow-load climb or a mountain descent can push fluid, pads, and rotors harder than usual.
- Before a long trip: if you are about to drive across several states, knowing the brake state in advance is cheaper than a roadside repair.
- Following a warning light: a brake or ABS light that comes on intermittently often needs a code scan as a starting point.
- After a recall or service bulletin: some manufacturers issue notices on calipers, boosters, or master cylinders, and a current inspection gives you a documented baseline.
For unrelated home maintenance questions that come up while you are planning a service day, you can also browse other guides on the site, such as this practical guide to garage door cable replacement, to keep a running checklist for the whole property.
When a paid diagnostic is the better choice
A free check is a screening tool. It is not a substitute for a deeper diagnostic when the symptom points to something that the standard checklist does not cover. Consider paying for a more detailed look if any of the following apply.
- The pedal goes to the floor or feels spongy, which can indicate air in the lines, a failing master cylinder, or a fluid leak.
- The vehicle pulls hard to one side under braking, which can mean a stuck caliper, a collapsed brake hose, or uneven pad wear.
- There is a strong burning smell after a stop, which can signal an overheated caliper or a dragging parking brake.
- The ABS or brake warning light returns after the free inspection clears it, which suggests an intermittent electrical or sensor issue.
- You recently had a brake job done and the symptoms are new, which can point to a bedding-in problem, a loose caliper bolt, or a contaminated rotor.
- The vehicle is more than ten years old and has original rubber brake lines, which can deteriorate internally even when they look fine on the outside.
For For additional context, broader context on how braking systems work and the physics behind stopping distance, the Wikipedia entry on brakes covers the basic principles, the difference between disc and drum designs, and the role of friction materials. It is a useful reference when a shop uses terms you want to understand before approving any work.
How shops structure the free offer
Most shops run the no-cost inspection as a lead-in to a potential repair. That is not a hidden motive in itself. It is how the service is paid for: the shop invests technician time in the hope of earning the brake job if you need one. Understanding the business model helps you stay focused on the facts.
| Business model | What is free | What is paid | What to watch for |
|---|---|---|---|
| National chain | Standard checklist, test drive, written findings | All parts, all labor, fluid flush, rotor machining | Aggressive upsell on premium pads or rotor replacement when only pads are needed |
| Independent shop | Visual check, pad measurement, fluid test | Same as chain, plus any custom fabrication | Pressure to commit on the spot; ask for the report in writing |
| Dealership | Sometimes free during a service visit, otherwise bundled with oil change | OEM parts at higher cost, software updates for ABS modules | Higher parts pricing, but better access to manufacturer service information |
| Visual check at your location | Travel fee plus any repair | Limited ability to lift the vehicle without a portable ramp or jack stands | |
| Tire or quick-lube store | Quick pad and rotor look during a tire rotation | Brake jobs, fluid service | Less depth than a dedicated brake shop, but a useful early signal |
The structural difference matters because it shapes the inspection depth. A national chain often follows a published checklist, which makes results easier to compare. An independent shop may be more flexible but less standardized. A dealership has the best access to factory service information but usually charges more for parts. A mobile mechanic is convenient but limited in what can be checked without a lift.
How to read the inspection report
Whether the shop hands you a printout, an email, or a verbal walkaround, the useful data points are the same. A good report tells you four things for each measured item: the current value, the minimum acceptable value, the unit of measurement, and a pass or fail flag. If any of those are missing, ask the technician to clarify before you leave.
- Pad thickness: usually given in millimeters, with the minimum often between 2 and 3 mm depending on the pad compound.
- Rotor thickness: given in millimeters, with the minimum stamped on the edge of the rotor or listed in the service manual.
- Fluid condition: described by color (clear, amber, dark, black) and by moisture content if a strip test was used.
- Brake line condition: described as pass, monitor, or fail, with notes on any corrosion or swelling.
- Caliper function: usually a pass or fail note on slide pins and piston movement.
- Estimated remaining life: some shops add a mileage range for pads, which is a useful planning tool but only an estimate.
Keep the report. If you visit a different shop later, the numbers give the next technician a starting point and reduce the chance of being told you need work you do not need.
Common findings and what they actually mean
Inspection results fall into a few predictable patterns. Knowing what each one implies helps you decide whether to schedule a repair immediately, plan one soon, or simply monitor the situation.
| Finding | What it usually means | Typical action |
|---|---|---|
| Front pads at 4 to 5 mm | Normal wear, several thousand miles of life left | Monitor, recheck at next oil change |
| Front pads below 3 mm | Wear approaching minimum, rotor damage risk rises | Schedule pad replacement within weeks |
| Rear pads worn faster than fronts | Possible stuck rear caliper or dragging parking brake | Inspect caliper slides and parking brake adjustment |
| Rotor scored or grooved | Pads wore down to backing plate, or debris trapped | Resurface if above minimum thickness, otherwise replace |
| Brake fluid dark or contaminated | Moisture absorption, possible degraded boiling point | Flush and refill with the spec fluid |
| Soft or spongy pedal | Air in lines, master cylinder issue, or fluid leak | Paid diagnostic before any further parts replacement |
| ABS warning light on | Wheel speed sensor, tone ring, or ABS module issue | Code scan first, then targeted repair |
No single table can cover every case, but these patterns cover the majority of what a free brake inspection is likely to surface. The action column is a planning guide, not a substitute for the technician’s recommendation on your specific vehicle.
How to prepare for the appointment
A little preparation makes the inspection more useful and the conversation with the technician shorter. None of these steps are required, but each one removes a reason for the shop to guess.
- Write down the symptom: when it started, how often it happens, whether it is worse in wet weather, and whether the pedal feels different.
- Note the last brake service date if you know it, along with the mileage at the time.
- Bring any previous inspection reports, especially if the vehicle has been looked at by another shop recently.
- Clear the cargo area and the cabin floor so the technician can move the seats and access the pedal area if needed.
- Ask ahead whether the inspection requires an appointment or if walk-ins are accepted, and how long the wait typically is.
- Decide in advance whether you want the wheels removed if any are worn enough to need a closer look; some shops only do this on request.
For homeowners who are also juggling other maintenance projects, pairing the brake appointment with a broader home checklist can save separate trips. Posts like this overview of how to hire the right home remodeling contractors are a useful reminder that scheduling discipline applies to the whole property, not just the car.
Questions to ask during the inspection
The technician’s report is only one part of the value. The conversation around it is where the rest of the value comes from. A short list of direct questions can save you a return visit.
- Which measurement is closest to its minimum, and how much margin is left?
- Is the wear pattern even across the axle, or is one side wearing faster?
- If rotors are within spec but scored, can they be resurfaced instead of replaced?
- What brake fluid specification does the vehicle use, and is the current fluid within moisture limits?
- If only the front pads need replacement, can the rear pads wait, and for how long?
- Are there any open technical service bulletins or recalls on the brake system for this model and year?
- What is the cost difference between economy, mid-range, and premium pads and rotors for this vehicle?
- Is there a written estimate before any repair work begins, and how long is it valid?
These questions do not slow down the inspection. They give the technician a reason to share the numbers rather than just the conclusion, which is what you actually need to make a good decision.
After the inspection: making the repair decision
Once you have the report and the answers, the next step is a clear decision tree. The pattern below covers most cases, but always defer to the technician’s recommendation on the specific vehicle you drive.
- If everything is within spec and you have no symptoms, file the report and recheck at your next routine service.
- If pads are close to minimum but rotors are still good, schedule a pad replacement and have the rotors resurfaced or replaced based on measured thickness.
- If fluid is contaminated, schedule a flush at the same time as the brake job to avoid doubling the labor cost later.
- If the report flags a caliper or line concern, ask for the finding in writing and a second opinion if the repair cost is significant.
- If a warning light is on and the shop cannot read the code during the free inspection, pay for a dedicated diagnostic before approving any parts replacement.
The single most common mistake is treating the free check as the final word. It is the first word. The second word is usually a paid, more detailed look, and that is normal.
Frequently asked questions
How long does a free brake inspection take?
Most free brake inspections take 20 to 45 minutes, including a test drive, a visual check under the hood, and measurements on the pads and rotors. A quick drive-through check can be done in under 10 minutes but usually only covers pad thickness and fluid level.
Do I need an appointment for a free brake inspection?
Many shops accept walk-ins for a free brake inspection, but the busier locations often prefer an appointment. Calling ahead lets you confirm availability, the expected wait time, and whether wheels will be removed during the check.
What does a free brake inspection include for the rear brakes?
It depends on the shop. Some shops remove the rear wheels for a full look, while others only check pad thickness through the wheel. If you have a symptom that points to the rear brakes, ask the shop to remove the wheels on the affected axle before the inspection starts.
Can a free brake inspection find an ABS problem?
A free brake inspection usually includes a basic scan for ABS warning codes, which can identify a stored fault. However, a full ABS diagnostic with live data and module-level testing is typically a separate paid service.
Is a free brake inspection the same as a safety inspection?
No. A free brake inspection is a focused look at the braking system at no charge, while a state or provincial safety inspection is a regulated, comprehensive check required for vehicle registration in some jurisdictions. The free check is more limited in scope and does not produce an official certificate.
Should I get a free brake inspection before a road trip?
Yes, a free brake inspection is a sensible pre-trip step, especially before a long highway drive or a mountain route. The report gives you a clear picture of pad life, rotor condition, and fluid state so you can plan any work before you leave.
How often should I get a free brake inspection?
For most drivers, a yearly free brake inspection at the time of an oil change or tire rotation is a reasonable rhythm. If you tow, drive in heavy traffic, or notice any change in pedal feel or noise, schedule one sooner.
Will the shop try to sell me something after a free brake inspection?
Most shops will share the findings and a written estimate for any recommended work, but you are not obligated to schedule repairs on the spot. Ask for the report in writing, take it home, and compare it with any other quotes you want to gather.
Can I get a free brake inspection for a used car before I buy it?
Yes, and it is a smart step. A free brake inspection can reveal thin pads, scored rotors, soft lines, or a contaminated master cylinder that the seller may not have disclosed. Use the findings to negotiate the price or to plan a service budget after purchase.
What should I bring to a free brake inspection appointment?
Bring a list of any symptoms, the date and mileage of the last brake service if you know it, and any previous inspection reports. Clearing the cabin and cargo area also helps the technician access the pedal area and the master cylinder without delay.
Leave a Reply