
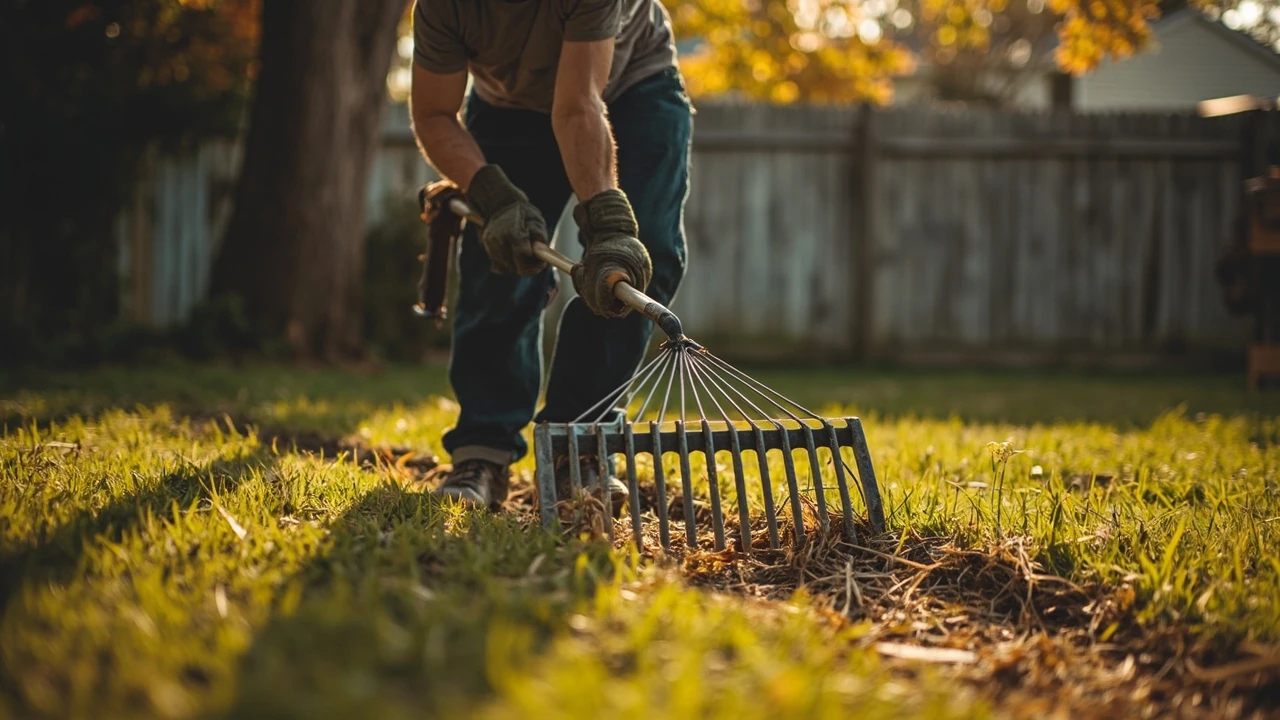
Dethatching your lawn without damaging the grass
A spongy lawn that sheds water instead of soaking it in is one of the most common complaints from homeowners in late summer. The cause is usually a layer of dead roots, stolons, and stems sitting between the green blades and the soil, and the fix is a mechanical process called dethatching. Done at the right time and at the right depth, dethatching can transform how a lawn breathes, drinks, and feeds. Done at the wrong time or too aggressively, it can leave a yard looking thin and tired for the rest of the season.
This guide is written for homeowners who want to understand what dethatching actually does, when it is worth the effort, and how to approach it without wrecking the lawn. It is not a sales page for any one machine, and it is not a generic lawn-care roundup. The focus is on the specific question of when and how to remove thatch mechanically, which is what most people mean when they search for dethatching help.
What thatch is and why dethatching matters
Thatch is the layer of organic matter that builds up between the green grass blades and the soil surface. It is a mix of dead and living material: old grass stems, stolons, rhizomes, root fragments, and clipped leaf debris that has not yet broken down. A thin layer, roughly less than half an inch, is normal and even helpful. It acts as a mild cushion, slows evaporation, and slowly returns nutrients to the soil as soil organisms break it down.
Problems start when thatch accumulates faster than soil microbes can decompose it. The layer thickens, becomes fibrous and mat-like, and begins to hold water above the soil instead of letting it pass through. Roots stay shallow because they find moisture and air near the surface, and the lawn becomes more vulnerable to heat, drought, and foot traffic. According to the overview of dethatching equipment and process, thatch removal is meant to cut through this layer so water, air, and nutrients can reach the root zone again.
Thatch does not build up equally on every lawn. It tends to be heaviest on:
- Cool-season grasses such as Kentucky bluegrass and creeping red fescue, which produce aggressive rhizomes.
- Lawns that are heavily fertilized with quick-release nitrogen, which pushes fast top growth.
- Yards that are routinely cut too short, because short clippings still contribute to the layer and the crowns sit closer to the surface.
- Acidic or compacted soils where microbial activity is reduced and decomposition slows.
- Properties with limited earthworm activity, since worms help mix organic matter into the soil.
If you are not sure whether your lawn actually has a thatch problem, a quick test is more reliable than guessing. Cut a small wedge out of the turf with a flat spade, about two to three inches deep, and look at the profile in cross-section. A healthy lawn has a thin brown band above the soil, a clear root zone, and a definite boundary between roots and dirt. A thatch-heavy lawn shows a thick, spongy, tan-colored mat that you can peel back like felt.
How to tell if dethatching is actually needed
Homeowners often assume any tired-looking lawn needs dethatching, but the symptoms overlap with compaction, drought stress, fungal disease, and simple nutrient deficiency. Treating the wrong problem wastes time and can make the real issue worse. A few checks help separate thatch problems from other causes.
Feel and footprint test
Walk across the lawn in bare feet or with thin-soled shoes. A thatchy lawn feels noticeably springy or spongy, almost like walking on a thin foam pad. Healthy soil and turf feel firm, with the grass blades yielding slightly but the ground beneath feeling solid. If the surface is hard and unyielding, the problem is more likely compaction, which calls for aeration rather than dethatching.
Water behavior
Run a sprinkler or watch the lawn during a steady rain. On a healthy lawn, water soaks in within a few minutes and the surface darkens evenly. On a thatchy lawn, water beads on top, runs off the sides, and the layer stays damp long after the soil underneath has dried. Puddling and runoff on a flat lawn are a strong sign that the thatch layer is blocking infiltration.
Probe and wedge inspection
Beyond the spade wedge, a soil probe or even a long screwdriver gives useful information. Push it into the ground in a few spots. In compacted soil, the probe stops at a hard layer an inch or two down. In a thatch-bound lawn, the probe slides through a soft upper layer and then meets firmer soil below. If the thatch layer is thicker than about half an inch and the soil beneath is reasonably loose, dethatching is a sensible next step.
Mowing and disease clues
Lawns with a heavy thatch layer often look ragged after mowing, because the mower wheels sink into the spongy surface and scalp high spots. They also tend to struggle with red thread, brown patch, and dollar spot, because the thatch layer holds humidity at the crown of the plant. Persistent disease pressure in an otherwise well-fed and well-watered lawn is a quiet signal that the thatch layer has tipped past the helpful range.
Dethatching versus aeration versus scarifying
The terms dethatching, scarifying, and aeration are often used interchangeably, but they describe different mechanical actions. Choosing the right one matters, because each tool does a different job and the wrong choice can stress the lawn for no benefit.
| Process | Primary action | Best for | Typical depth |
|---|---|---|---|
| Dethatching | Vertical blades or tines slice through the thatch layer to pull it up | Light to moderate thatch, less than about 1.5 inches thick | Surface to roughly 0.5 inch into the thatch |
| Scarifying | Aggressive vertical cutting into the surface and upper root zone | Heavy thatch, moss-infested lawns, renovation projects | Surface to roughly 0.25 to 0.5 inch into soil |
| Core aeration | Hollow tines remove small plugs of soil and thatch | Compacted soil, thick thatch on heavy clay, improving infiltration | 2 to 4 inches into the soil profile |
For a typical homeowner lawn, the choice usually comes down to dethatching and core aeration rather than true scarification, which is closer to a professional renovation. A simple rule of thumb is to dethatch when the problem is the thatch layer itself, and to aerate when the problem is dense or compacted soil. Lawns with both issues can benefit from doing one in early fall and the other the following spring, rather than both in the same week.
For readers balancing a long list of home maintenance tasks, the same kind of project planning that goes into hiring the right remodeling team for a renovation applies here: match the tool to the problem, time the work to the lawn’s natural recovery cycle, and avoid stacking multiple stressful treatments in one season.
When to dethatch a lawn
Timing is the single biggest factor in whether dethatching helps or harms. The goal is to remove the thatch while the grass is still actively growing, so it can recover quickly. Outside the active growth window, dethatching tears the lawn open at a time when the grass cannot fill back in, which leaves the soil exposed to weed seeds and heat stress.
Cool-season grasses
For Kentucky bluegrass, perennial ryegrass, and the fescues, the best window is early fall, roughly six to eight weeks before the first hard frost. Soil is still warm, air temperatures are cooling, and the grass is pushing energy into root growth rather than top growth. A second option is early spring, once the lawn has been mowed two or three times and is clearly out of dormancy, but fall is usually safer because summer weed pressure is lower and recovery is faster.
Warm-season grasses
For Bermuda, zoysia, St. Augustine, and centipede, late spring through early summer is the right window. These grasses are at peak growth as soil temperatures rise, and they spread through stolons and rhizomes that can rapidly fill in the thin areas left behind by dethatching. Dethatching a warm-season lawn in fall is risky because the grass is about to go dormant and will not recover before winter.
Conditions to avoid
Do not dethatch during a drought, during a heat wave, or when the lawn is under any other stress such as active disease or insect pressure. Stressed grass does not have the reserves to recover from the tearing action. It is also wise to avoid dethatching newly seeded or sodded lawns within their first full year. The root systems are too shallow, and the mechanical action can pull young plants out of the ground.
Tools used for dethatching
Dethatching tools range from manual to professional, and the right one depends on lawn size, thatch depth, and budget. Each category has tradeoffs, and the cheapest option is not always the worst for a small yard. Readers who want more background on Dethatcher can use the Dethatcher overview while reviewing this point.
| Tool type | Best lawn size | Thatch depth handled | Effort and cost |
|---|---|---|---|
| Manual dethatching rake | Under 500 sq ft, spot work | Light to moderate thatch | Low cost, high physical effort |
| Tow-behind dethatcher | 0.25 to 1 acre | Moderate thatch | Moderate cost, low effort beyond the initial pull |
| Walk-behind power dethatcher | 0.1 to 0.5 acre | Moderate to heavy thatch | Higher rental or purchase cost, faster results |
| Professional scarifier | 0.5 acre and up, or heavy renovation | Heavy thatch, moss, surface mat | Usually rented by the day or hired with a service |
Manual dethatching rakes
A dethatching rake looks like a bow rake with curved, sharp tines designed to slice downward and pull upward through the thatch. They are inexpensive and effective on small lawns or in tight areas where a machine would be awkward. The downside is physical effort. Pulling a dethatching rake across even a few hundred square feet is real work, and the tines clog quickly with thatch and debris. For a homeowner with a small yard and light thatch, however, a manual rake is often the most practical tool.
Tow-behind dethatchers
These attach to a riding mower or garden tractor. The dethatching action comes from a row of spring tines or short blades mounted on a horizontal bar. They cover ground quickly and are widely available at rental yards and garden centers. They work best on lawns that are relatively flat and free of buried obstacles. On rough or rocky ground, the tines can catch and tear, so a careful pre-mow and walk-through is essential.
Walk-behind power dethatchers
These resemble a push mower but with a vertical-shaft engine driving a reel of blades or tines. They are the most common rental choice for serious dethatching projects. Adjusting blade depth is critical, and so is going over the lawn in two directions for even coverage. Most homeowner-friendly models are gas-powered, though electric options exist for smaller yards.
Combination machines
Some rental yards offer machines that can dethatch and core aerate with interchangeable drums. These are useful for lawns with both thatch and compaction, but the drums need to be swapped carefully and the settings documented. A combined pass without the right setup can be more harmful than helpful.
Preparing the lawn for dethatching
A little preparation makes the actual dethatching pass cleaner, faster, and easier on the grass. Skipping these steps usually means a second pass later, which is more work and more stress on the lawn.
- Mow the lawn slightly lower than usual, but do not scalp it. Cutting to about 1.5 to 2 inches for cool-season grasses and 1 to 1.5 inches for warm-season grasses exposes the thatch layer and lets the blades reach it without dragging through tall grass.
- Water lightly the day before if the soil is dry. Moist soil cuts more cleanly and produces less dust. Avoid saturating the ground, because soft soil tears and ruts under the weight of a machine.
- Mark sprinkler heads, shallow irrigation lines, and any buried cables. A driveway stake and a small flag are enough; a damaged sprinkler line turns a simple project into a plumbing call.
- Remove debris. Toys, hoses, sticks, and stones can jam a dethatcher or be thrown by the blades, which is dangerous for the operator and the equipment.
- Rake up any heavy leaf cover. A thick mat of leaves sits on top of the thatch and blocks the blades from reaching the layer that actually needs to come out.
How to dethatch a lawn step by step
The actual pass is straightforward once the lawn is prepared, but a few details make a real difference in the result.
- Set the dethatcher blades or tines so they just touch the thatch layer without digging into the soil. A common mistake is to set the blades too deep on the first pass, which pulls up soil along with the thatch and slows recovery.
- Make the first pass in one direction across the lawn, going at a steady walking pace. Faster is not better. Too fast and the blades skip over the thatch; too slow and they tear the turf.
- Make a second pass at a 45 to 90 degree angle to the first. Two perpendicular passes give a more uniform result than going over the same strip twice in the same direction.
- Stop and check the collection box or the ground behind the machine after every pass. If the box is filling with green clippings and soil rather than brown thatch, the blades are set too low and need to be raised.
- Rake or blow the loosened thatch into piles and remove it. Leaving a thick layer of thatch on the surface smothers the lawn almost as badly as the original problem.
- Water the lawn deeply but gently once the thatch is removed. The goal is to settle the soil and keep the crowns from drying out while the grass recovers.
Aftercare and recovery
What happens in the two to four weeks after dethatching is just as important as the dethatching itself. The lawn is essentially wounded, and it needs light, water, and a little food to come back thicker than before.
Watering
Switch from shallow daily sprinkles to deeper, less frequent watering for the next few weeks. The goal is to encourage roots to chase moisture downward into the soil, which is exactly what dethatching is meant to support. For most soils, that means about an inch of water per week, applied in one or two long sessions rather than several short ones.
Overseeding
Dethatching is an ideal moment to overseed, especially in the fall for cool-season lawns. The process scratches the soil surface and creates small pockets where seed can make contact, which improves germination. Use a seed that matches the existing lawn, not a cheap generic mix, and keep the seedbed moist until germination is complete.
Light fertilization
A modest application of a balanced fertilizer after dethatching supports recovery, but a heavy dose of nitrogen can push top growth at the expense of roots. A starter fertilizer is appropriate when overseeding; otherwise a slow-release product at half the normal rate is usually enough.
Traffic and mowing
Keep foot traffic off the lawn for the first week or two, and raise the mower height for the next two cuts. Cutting too short too soon is a common reason that dethatched lawns look thin and yellowed through the rest of the season. Returning to a normal mowing height of about three inches for cool-season grass and two inches for warm-season grass after two or three cuts gives the lawn the leaf area it needs to recover.
Common dethatching mistakes to avoid
Most lawn damage from dethatching comes from a small set of repeated mistakes. Knowing them in advance saves a season of recovery time.
- Dethatching at the wrong time of year, especially during summer heat or just before winter dormancy.
- Setting the blades too deep on the first pass and pulling up soil along with the thatch.
- Doing it in a single aggressive pass instead of two lighter passes in different directions.
- Dethatching a lawn that is already thin or stressed, which rarely thickens it back up and often makes weed pressure worse.
- Skipping the cleanup step and leaving the loosened thatch on the surface, which smothers the grass underneath.
- Combining dethatching, core aeration, and a heavy fertilization in the same weekend, which overwhelms the lawn’s recovery capacity.
- Dethatching a lawn with a weed problem without addressing the weeds first, because dethatching brings weed seeds to the surface along with the thatch.
DIY versus hiring a dethatching service
For most homeowners, the decision comes down to lawn size, equipment access, and how the lawn looks afterward. A 1,000 square foot lawn is a Saturday afternoon project with a rented walk-behind dethatcher and a helper. A half acre or more is a different calculation, because the rental cost, the time, and the disposal of pulled thatch add up quickly.
Hiring a service is usually most useful when:
- The thatch layer is more than about 1.5 inches thick and a true scarifier is needed.
- The lawn is large, sloped, or full of obstacles that make a machine awkward.
- The homeowner has limited time or physical ability to push a dethatcher in the heat of early fall.
- The project is part of a larger renovation, including overseeding, topdressing, and a follow-up fertilizer program, where one contractor coordinates the whole sequence.
Whether the work is done by the homeowner or a service, the underlying steps do not change. The lawn still needs to be mowed slightly lower beforehand, the blades still need to be set correctly, and the thatch still needs to be removed afterward. The only difference is who is standing behind the machine.
Safety and practical considerations
Dethatching machines are louder and more dangerous than they look. A few safety habits make a real difference.
- Wear hearing protection, eye protection, sturdy footwear, and gloves. Thatch and small stones can be thrown at face level.
- Keep children and pets well clear of the working area. The blades can throw debris several feet.
- Disconnect the spark plug wire before clearing a jam or adjusting blade depth. A dethatcher that fires up unexpectedly is a common cause of hand injuries.
- Check the depth setting on a small, inconspicuous patch of lawn before committing to a full pass. Five minutes of testing saves a season of patching.
- For homeowners planning other large projects around the same time, such as garage door cable replacement or other exterior maintenance, sequence the noisy work so neighbors are not dealing with multiple disruptions in the same week.
Seasonal checklist for dethatching
This checklist condenses the process into a usable plan that a homeowner can follow without rereading the whole article.
- Inspect the lawn in late summer by cutting a small wedge and measuring the thatch layer.
- Confirm the grass type and identify the correct dethatching window.
- Schedule a rental or arrange for a service about a week before the work date.
- Mow slightly lower two days before dethatching, and water lightly the day before if the soil is dry.
- Mark sprinkler heads, shallow utilities, and any obstacles in the yard.
- Make two passes at perpendicular angles, with the blades set just into the thatch layer.
- Rake and remove the loosened thatch the same day.
- Water deeply, overseed if appropriate, and apply a light starter fertilizer.
- Keep traffic light and mow at a raised height for the first two or three cuts.
- Plan the next core aeration for the opposite season to maintain a healthy soil profile.
Frequently asked questions
How do I know if my lawn needs dethatching?
The most reliable check is to cut a small wedge and look at the profile. A thatch layer thicker than about half an inch is worth addressing. Spongy feel underfoot, runoff during rain, and recurring fungal disease in an otherwise healthy lawn are also common signs.
What time of year is best for dethatching?
Early fall for cool-season grasses and late spring to early summer for warm-season grasses. The lawn should be actively growing so it can recover quickly.
Can I dethatch a newly seeded or sodded lawn?
It is best to wait at least a full year, and ideally until the lawn has been mowed several times and the root system is well established. Dethatching too early can pull young plants out of the ground.
Should I dethatch when the lawn is wet?
No. Dethatching on a wet lawn tears the grass and smears the soil. The soil should be slightly moist, not saturated, and the surface should be dry enough that clippings and thatch release cleanly.
How often does a lawn need dethatching?
Most established lawns need dethatching every two to three years, if at all. Lawns with aggressive grasses, heavy fertilization, or acidic soils may need it more often. The inspection method, not the calendar, should drive the decision.
Is dethatching the same as scarifying?
They are closely related but not identical. Dethatching typically refers to lighter work that targets the thatch layer, while scarifying goes deeper into the surface and upper root zone. For most homeowner projects, dethatching is the right term to use.
Can I use a regular leaf rake instead of a dethatching rake?
A standard leaf rake will pull up some loose material, but it will not cut through the thatch mat the way a dethatching rake will. For anything beyond the lightest surface debris, a dethatching rake or a powered machine is more effective.
Should I fertilize after dethatching?
A light application of a balanced or starter fertilizer helps recovery, especially if you are also overseeding. Heavy nitrogen applications should be avoided because they push top growth before the roots have rebuilt their reserves.
What should I do with the pulled thatch?
Thatch can be composted, used as mulch in non-lawn areas, or bagged for curbside pickup depending on local rules. It should not be left on the lawn after dethatching, because it will smother the recovering grass.
Can dethatching fix a weedy lawn?
Dethatching is not a weed control method, and it can actually bring weed seeds to the surface. It is best to address weeds before dethatching, and then overseed and maintain a thicker lawn afterward to reduce future weed pressure.
Leave a Reply