
Orange peel wall texture: what it is and how it is actually used on interior walls
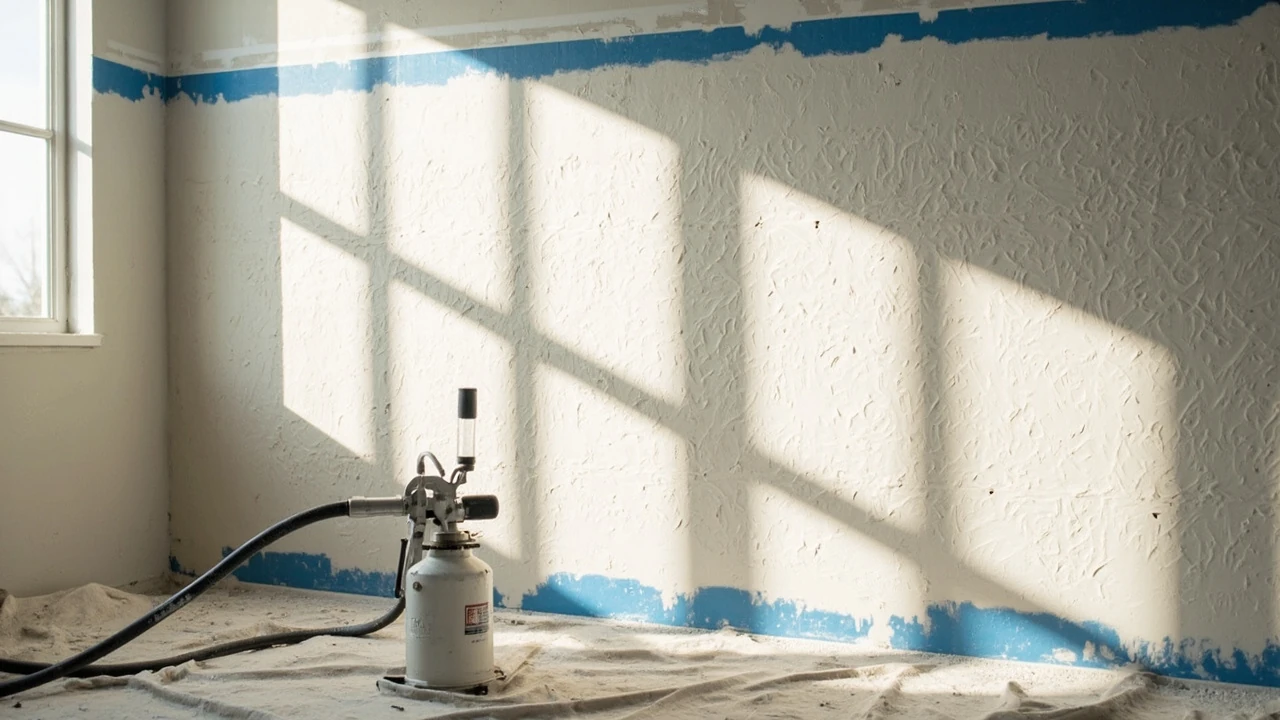
A homeowner stands in a freshly primed room, holding a can of wall spray next to a rented hopper gun, and asks the practical question that brings most people to this topic: is orange peel wall texture the right finish for this space, and can I produce a result that does not look like a patchy mistake? The texture is one of the most common sprayed drywall finishes in North American homes, valued for hiding minor imperfections and for the soft, broken surface it leaves on walls and ceilings. Getting it right depends less on artistic skill and more on choosing the right spray setup, the right mud consistency, and a measured spraying distance.
This guide walks through what the finish is, how it is applied by professionals and by careful DIYers, what it costs, how it compares to other sprayed and hand-applied textures, and how to repair damaged sections without redoing an entire room. The intent is to give you a complete reference so that you can decide whether to spray it yourself, hire it out, or choose a different finish altogether.
What orange peel wall texture actually is
Orange peel wall texture is a sprayed drywall finish that resembles the dimpled skin of an orange. The pattern is created by forcing thinned joint compound, sometimes called mud, through a hopper gun or a pressurized spray rig so that it lands on the wall in small, irregular droplets. As the droplets dry, they hold their shape and form a uniform stipple across the surface.
The pattern is classified by its droplet size and density:
- Fine orange peel. Small, tightly spaced droplets. Reads almost like a soft sand finish from a distance and is common in newer tract homes and light commercial spaces.
- Medium orange peel. Slightly larger droplets with more visible variation. This is the most common residential variant and is the one most people picture when they hear the term.
- Heavy orange peel. Larger, more pronounced droplets that cast faint shadows under raking light. Used to disguise moderately wavy drywall or older plaster.
It is important to separate the wall finish from the unrelated musical group whose name is sometimes the first thing a search engine returns. The texture is named purely for its visual resemblance to citrus peel, not for any band or album, and it has been a standard drywall trade finish in the United States and Canada for several decades.
Why contractors and homeowners choose it
The finish has stuck around because it solves several real problems at once. Understanding the reasons it is specified helps you decide whether it is right for a particular room.
Hides minor drywall flaws
Joint compound, paper tape, fastener heads, and sanding marks all leave a flat wall looking uneven. A sprayed texture breaks up reflected light, so small waves, missed spots, and slightly proud joints are far less visible than on a smooth Level 5 finish. For renovation work where the drywall underneath is not perfect, that forgiveness is the main reason the finish is chosen.
Reduces light glare on large walls
On a long hallway wall or a tall stairwell, a perfectly smooth surface can act almost like a soft mirror, exaggerizing uneven framing and any subtle trowel marks. A broken surface diffuses the light, which is one reason texture is so common in production housing.
Matches existing walls in older homes
If a home was finished in the 1980s or 1990s, the walls were almost certainly sprayed. Tying a new addition, a repaired water damage patch, or a remodeled basement back into the existing finish is much easier when the new work uses the same pattern.
Accepts paint without extra steps
Unlike popcorn texture, orange peel wall texture does not need to be removed before repainting. A standard primer and two finish coats roll or spray on directly, which makes future repaints straightforward.
Tools and materials you will need
The list is short, but each item affects the final result. Skimping on any of them is the most common reason DIY textures look uneven.
- Joint compound. Either a ready-to-use all-purpose mud or a lightweight topping compound. Topping mud sprays more cleanly and sands more easily, which is why most professionals prefer it for the texture coat.
- Water. For thinning the compound to the right consistency.
- Hopper gun or texture sprayer. A hand-cranked or air-powered hopper with interchangeable nozzle orifices. A powered airless texture rig is faster for whole-house jobs.
- Air compressor. Sized to the gun manufacturer’s cfm requirement, typically 4 to 8 cfm at 40 psi for a small hopper gun.
- Drill and mixing paddle. For blending the compound to a lump-free consistency.
- Masking supplies. Plastic sheeting, painter’s tape, and a roll of window film. Overspray travels farther than most beginners expect.
- Personal protection. A N95 or P100 respirator, safety glasses, and a hat. Drywall dust and wet mist are both unpleasant.
| Item | Budget DIY choice | Contractor-grade choice | Why it matters |
|---|---|---|---|
| Compound | All-purpose mud, premixed | Lightweight topping compound | Topping mud sprays finer and reduces orange peel texture drag |
| Sprayer | Inexpensive gravity hopper with hand crank | Air-powered hopper or airless rig | Controls droplet size and spray pattern |
| Compressor | Small 6-gallon portable | 30-gallon or larger, 5+ cfm at 40 psi | Avoids pressure drop that causes spitting |
| Masking | Drop cloths, basic tape | Plastic sheeting, film, lap sealant tape | Stops overspray on windows, trim, and floors |
Preparing the room before you spray
Preparation determines whether a sprayed finish looks professional or amateurish. The texture itself takes minutes to apply; the masking and priming take hours. Treat prep as the main job and the spraying as the final step.
- Prime the drywall. Raw drywall absorbs moisture unevenly, which causes flashing and a streaky texture. A dedicated drywall primer evens out the suction and gives the texture something consistent to bond to.
- Mask everything you do not want textured. Remove outlet covers and switch plates. Tape plastic over windows, door frames, light fixtures, and any flooring that is staying. Tape trim edges with a wide painter’s tape and press it firmly so spray cannot bleed underneath.
- Set up ventilation. Open windows and set a box fan pulling air out of the room. Drywall mist settles on every horizontal surface, and a fan dramatically reduces how far it drifts.
- Test your pattern. Spray a 4 by 4 foot piece of scrap drywall or a section of cardboard before aiming at the wall. Adjust air pressure, nozzle size, and thinning until the droplets match the reference you are trying to match.
Mixing the compound to the right consistency
The single most common DIY mistake is spraying mud that is too thick. Thick compound clogs nozzles, leaves ropes on the wall, and creates a heavy, sloppy pattern that does not look like orange peel at all. The goal is a viscosity somewhere between heavy cream and a thin milkshake.
| Pattern | Approximate water addition | What it looks like when mixed |
|---|---|---|
| Fine orange peel | About 1 part water to 4 parts compound | Smooth, pourable, like thick cream |
| Medium orange peel | About 1 part water to 3 parts compound | Pourable but with slightly more body, like a thin milkshake |
| Heavy orange peel | About 1 part water to 2.5 parts compound | Notably thicker, still flows but holds shape briefly |
Mix in small batches with a drill and paddle, scraping the sides of the bucket, and strain the compound through a paint strainer if you have one. Lumps are the second most common cause of clogged guns and spitting.
How to apply orange peel wall texture step by step
Once the room is masked and the gun is dialed in, the actual spraying is quick. Work methodically and keep the gun moving.
- Hold the gun 18 to 24 inches from the wall. Closer than that and the droplets run together into a flat smear. Farther and the spray dries before it lands, leaving a sandy, weak finish.
- Keep the gun level and moving. Use smooth, overlapping side-to-side or up-and-down passes. Each pass should overlap the previous one by about 30 percent.
- Work in manageable sections. Spray one wall at a time rather than chasing wet edges around the room. A typical wall takes only a few minutes.
- Maintain a wet edge where possible. If a section starts to dry before you blend into it, stop and let the whole wall dry. Touching up a half-dry area creates visible seams.
- Let it dry fully before priming or painting. Most sprayed textures dry to the touch in 30 to 60 minutes, but full cure takes overnight in normal indoor conditions.
One important safety note: the compound mist contains fine particles that can irritate lungs quickly. A proper respirator is not optional, and bystanders should leave the room until the spray has settled.
Orange peel vs. other common drywall textures
Choosing a finish is really a question of which trade-offs you can live with. The table below compares the four finishes you are most likely to encounter when planning a project.
| Texture | Application method | Look | Hides flaws | Repair difficulty | Paint behavior |
|---|---|---|---|---|---|
| Orange peel wall texture | Sprayed | Soft, broken stipple resembling citrus skin | Good | Moderate, can be blended with a handheld sprayer | Accepts primer and paint directly |
| Knockdown | Sprayed then flattened with a knife | Larger splatters that are smoothed at the peaks | Very good | Harder, the knife pattern is hard to imitate | Accepts paint directly |
| Popcorn | Sprayed, often with aggregate | Heavy, acoustic, cottage-cheese appearance | Excellent | Difficult, often contains asbestos in pre-1980s homes | Paint absorbs unevenly and changes the look |
| Smooth (Level 5) | Hand troweled and skim coated | Flat, no visible texture | Poor, every flaw is visible | Easy to spot patch with a knife | Best paint appearance, especially with sheen |
For For additional context, most residential remodels, orange peel sits in a practical middle ground: enough texture to forgive average drywall work, but not so heavy that it dominates a room or traps dust the way popcorn can.
Cost considerations
The cost of orange peel wall texture depends on whether you hire a professional or do it yourself. Numbers vary by region, but a realistic range helps with planning.
- Professional spray, whole room or whole house. Many drywall subcontractors price texture as part of the finishing package. A standalone texture-only job on a single 12 by 12 room often falls in the $250 to $500 range, including setup and masking, in many U.S. markets. Whole-house projects are usually priced per square foot, often in the $0.50 to $1.50 per square foot range.
- DIY equipment rental. A hopper gun can be rented for roughly $30 to $50 per day, and a small air compressor for a similar amount. Buying an entry-level gun and a used compressor costs $150 to $300 total and pays for itself on a single large project.
- Materials. A 5-gallon pail of ready-mixed topping compound is enough for most single rooms and costs around $20 to $30. Masking plastic, tape, and primer add another $40 to $80 depending on room size.
Beyond direct cost, think about the value of time. Masking, spraying, and cleanup for a single room is a solid day of work for a first-time DIYer and a few hours for someone with experience.
Common mistakes and how to avoid them
Most failed texture jobs come from a small set of predictable problems. Spotting them ahead of time saves a lot of sanding and repainting.
- Spraying too close. The droplets run into each other and the wall ends up looking like a thin layer of stucco. Pull the gun back and reduce the material flow.
- Spraying too far. The compound partially dries in the air and lands as a sandy dust that does not bond. Move closer and make sure the air pressure is not too high.
- Thick, lumpy mud. Lumps clog the nozzle, causing the gun to spit, which leaves bare spots and thick spots side by side. Strain the mud and thin it gradually.
- No primer. Bare drywall soaks moisture unevenly, so the texture flashes and cures at different rates. Always prime first.
- Painting too soon. If the texture is still damp, primer and paint trap moisture and can cause adhesion problems or cloudy sheen. Wait overnight at minimum.
- Skipping a test board. Every gun, compressor, and room combination behaves a little differently. A test board prevents you from discovering a problem on the actual wall.
Repairing damaged orange peel wall texture
Damage happens, especially in high-traffic areas and on outside corners. The good news is that small repairs to orange peel wall texture are much easier than repairing a smooth Level 5 wall or a popcorn ceiling.
- Cut out the damaged area. Use a utility knife to trim a loose paper or peeling section back to sound drywall.
- Patch the drywall. Fill dents and gouges with setting-type joint compound, let it cure, and sand it flush.
- Prime the patch. Without primer, the new texture flashes against the surrounding wall.
- Spray the patch with a small aerosol can of wall texture. Premixed spray cans are sold at home centers specifically for this. They are calibrated to a medium pattern and let you build the texture in light passes.
- Blend the edges. While the texture is still wet, lightly mist the surrounding orange peel with water from a pump sprayer and feather the new texture into the old with a clean, dry brush.
- Let it dry, prime the patch again if needed, and repaint the entire wall from corner to corner. Spot painting texture almost always shows.
For larger repairs, a handheld hopper gun with a small compressor gives better control than aerosol cans and is worth renting if you have several patches to do.
Priming and painting over orange peel wall texture
Painting textured walls is similar to painting smooth walls, with a couple of adjustments. A standard latex primer works well, and most finish paints roll on directly. The main choice is between a roller and a sprayer.
- Roller. A 3/8-inch or 1/2-inch nap roller pushes paint into the texture valleys and gives good coverage. Use a slower, deliberate pace so the paint does not fling off the nap.
- Airless sprayer. A sprayer lays down an even coat in less time, which is helpful on whole-house jobs. Back-roll immediately after spraying to work the paint into the texture and to avoid a dry, dusty look.
- Sheen. Flat or eggshell finishes disguise remaining surface variation. Higher sheens highlight the texture, which can be desirable in modern interiors or undesirable if you are trying to make the texture disappear.
Expect to use slightly more paint per square foot than on a smooth wall, because the broken surface has more area. Budget around 10 to 20 percent extra compared to a smooth finish.
Where orange peel wall texture works best, and where to avoid it
Like every finish, orange peel has situations where it shines and situations where it causes problems.
- Good fits. Bedrooms, hallways, living rooms, basements, and ceilings where the drywall below is average. Garages and workshops where some visual break is welcome. Older homes where matching the existing finish matters.
- Poor fits. Bathrooms and other high-moisture spaces where the texture can hold water droplets against the drywall paper. Rooms where the design calls for a very clean, modern look, since the broken surface reads as traditional. Tight, well-lit spaces where the pattern will be visible up close and any inconsistency stands out.
For very modern interiors, a smooth Level 5 finish or a subtle hand-troweled skip-trowel texture is usually a better match. For traditional or transitional homes, orange peel is almost always appropriate.
Safety and cleanup
Spraying drywall compound is messier than most DIY projects, and a little planning makes cleanup quick.
- Respiratory protection. A N95 mask is the minimum. A half-mask with P100 filters is better, especially for ceiling work where the spray falls toward your face.
- Drop everything. Mist lands on every horizontal surface in the room and on the floor of adjacent rooms if the door is open. Tape a plastic sheet over the doorway and lay full coverage on the floor.
- Clean the gun promptly. Dried compound inside a hopper gun is the most common reason these tools stop working well. Flush with water, run a brush through the nozzle, and store the gun dry.
- Dispose of compound responsibly. Leftover thinned compound should not be poured down household drains. Let it settle in the bucket, pour off clear water, and let the solids dry before disposal.
Planning a project around the rest of your home
If you are remodeling more than a single room, texture decisions connect to the rest of the house. The pattern on a repaired bedroom wall should match the pattern in the hallway outside it. The sheen on a freshly painted ceiling should match the adjacent rooms. The most common planning mistake is treating texture as a single-room decision and ending up with walls that look slightly different from one space to the next.
For homeowners coordinating larger renovations, a useful approach is to choose a single reference wall, photograph the pattern in raking light, and use that photo as the standard for every other sprayed surface in the home. A consistent reference prevents small drift in droplet size, which is otherwise inevitable between different batches of mud or different days of work.
For a broader look at how texture decisions fit into a larger remodel, including how to coordinate drywall, paint, and trim trades, working through a practical guide to hiring remodeling contractors alongside this texture reference can keep scope and finish expectations aligned.
For homes where the texture work overlaps with other building systems, such as rerouting mechanical lines before a basement refinish or repairing a ceiling after a plumbing leak, it is also worth reading up on adjacent work like sewer line cleaning and what homeowners should know so that the order of operations for the project is realistic.
A short checklist before you start spraying
Run through this list on the day of the project. It is the same checklist a careful contractor runs through, and it catches the small issues that turn into visible problems later.
- Drywall is finished, sanded, and dust-free.
- Primer is dry and uniform across the surface.
- Room is fully masked, including windows, trim, and floors.
- Compound is mixed to the right viscosity and strained.
- Gun and compressor are tested on a scrap board or cardboard.
- Pattern on the test board matches the reference wall.
- Respirator, glasses, and a hat are on.
- Ventilation fan is running, with a window cracked for makeup air.
- A second person is available to help with masking or spraying the opposite side of a wall, if possible.
Frequently asked questions
Is orange peel wall texture the same as popcorn texture?
No. Orange peel wall texture is a fine, sprayed stipple that looks like the skin of an orange. Popcorn texture, sometimes called acoustic texture, is much heavier, often contains small aggregate, and is built up to a thicker layer. Popcorn is common on older ceilings and is more difficult to paint or repair.
Can I apply orange peel wall texture with a roller?
A standard roller leaves a different, flatter pattern than a true orange peel. Some homeowners use a technique called skip troweling or a stiff brush and thinned compound to mimic a sprayed look, but the result is not identical. For an authentic orange peel wall texture, a hopper gun or a pressurized sprayer is the standard tool.
What is the best joint compound for spraying orange peel texture?
Lightweight topping compound is the most common choice because it sprays cleanly, sands easily if you need to knock down high spots, and produces a fine droplet. All-purpose compound works but tends to spray heavier and can leave more orange peel texture drag if the mud is not thinned well.
How long does orange peel wall texture take to dry before painting?
Most sprayed textures are dry to the touch within 30 to 60 minutes in a normal indoor environment, but they need overnight to fully cure. Painting too soon can trap moisture and cause flashing or adhesion problems. Humid conditions extend the drying time significantly.
Can I match new orange peel wall texture to my existing walls?
Yes, in most cases. The key is matching droplet size and density, which means using a similar nozzle size, air pressure, and mud consistency. Test on a scrap board and compare it to the existing wall in raking light. Small differences are easy to disguise by feathering the new spray into the surrounding texture while both are still wet.
Do I need to remove orange peel wall texture before repainting?
No. The texture stays in place. You can prime and paint directly over it. If the surface is glossy or dirty, wash it first so the new paint bonds properly. Many homeowners paint over orange peel wall texture multiple times during the life of a home with no problems.
Is orange peel wall texture still popular in newer homes?
It remains common, especially in production housing and in remodels where the goal is to match the existing finish. In high-end custom homes, smooth Level 5 finishes and hand-troweled skip-trowel textures are more common, but the sprayed orange peel wall texture is still the most common residential drywall finish in many U.S. markets.
How do I fix a bad orange peel spray job?
Light problems, like a heavy or uneven pattern, can often be sanded down once the texture is fully dry and then reprimed and resprayed. Heavy problems, like runs or thick spots, are usually scraped or sanded back to the drywall, reprimed, and resprayed. The good news is that a respray blends into the existing surface, so the fix is rarely as large as it looks.
Can I spray orange peel wall texture over a painted wall?
It is possible, but the painted surface must be clean, sound, and lightly scuffed so the new texture can bond. Glossy paint should be deglossed. Priming the existing paint before spraying helps the texture hold its droplet shape. If the existing paint is peeling or chalking, it is better to scrape and prime before adding texture.
How much does it cost to have a professional spray orange peel wall texture?
Pricing varies by region and by project size, but a typical single room falls in the low hundreds of dollars when a drywall contractor is already on site. Standalone texture-only work on a single room is often $250 to $500 in many U.S. markets, while whole-house projects are usually quoted per square foot. Always get a written scope that includes masking, spraying, and cleanup.
Leave a Reply