
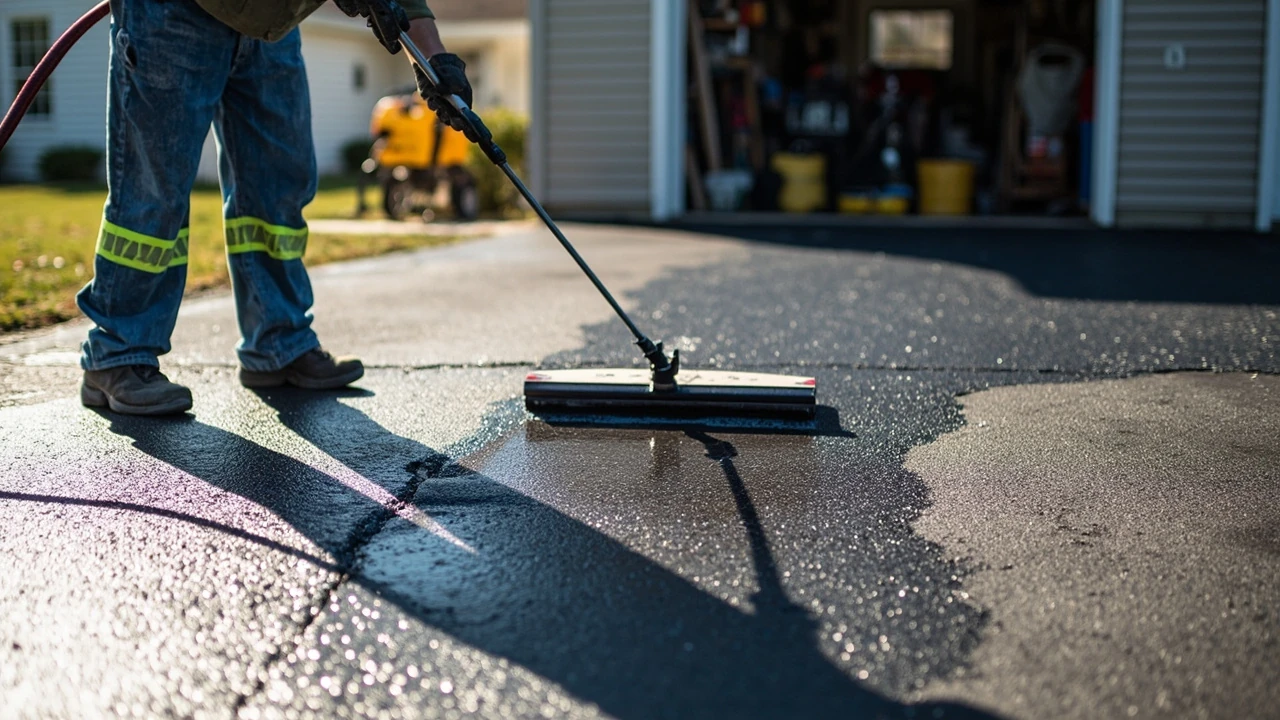
Driveway sealing: when it actually helps and how to do it right
A blacktop driveway that has gone from deep black to tired gray, a chalky concrete apron that drinks water instead of repelling it, hairline cracks that seem to multiply after every freeze-thaw cycle. These are the moments most homeowners start searching for driveway sealing. The search results are full of confident claims, contradictory advice, and product names that blur together. The goal of this guide is to slow that down and walk through what driveway sealing really does, what it cannot fix, and how to approach it as a planned project rather than an impulse weekend chore.
Driveway sealing is a maintenance step, not a renovation. It works by laying a thin protective film over the surface of asphalt, concrete, or pavers to slow water intrusion, UV damage, and chemical attack. It is not a structural repair, and it will not glue a crumbling driveway back together. The rest of this page breaks down how to tell whether your surface is a good candidate, what products are available, how the work is actually done, and how to avoid the small mistakes that ruin an otherwise good seal job.
What driveway sealing actually does
Sealants are formulated coatings, not patches. Their job is to sit on top of the surface and absorb the wear that would otherwise pit, fade, and crack the underlying material. On asphalt, a sealer restores some of the flexible binder that sunlight slowly bakes out of the mix. On concrete, a penetrating sealer clogs the pores so water and deicing salts cannot soak in. On pavers, a sealer can lock joint sand in place and reduce staining.
The benefits show up over years, not days. A well-timed seal job delays the need for resurfacing, makes the surface easier to clean, and keeps small cracks from growing into repair invoices. The trade-off is that the surface has to be in reasonable condition to begin with, and the sealer itself has to be reapplied on a schedule.
Where sealing earns its keep
- Asphalt that has lost its dark color and looks dry or chalky.
- Concrete or pavers that absorb water rather than letting it bead.
- Surfaces exposed to regular road salt, fuel drips, or heavy UV.
- Driveways less than about 15 to 20 years old with no structural failure.
Where sealing cannot save you
- Alligator-patterned asphalt that flexes under a car tire, which signals base failure.
- Potholes deeper than an inch or wider than a softball.
- Concrete slabs that have settled, heaved, or are spalling across broad areas.
- Fresh asphalt that has not had time to cure.
How to tell if your driveway actually needs sealing
Most homeowners seal too early, too often, or on the wrong surface. Before scheduling anything, walk the driveway slowly with a notebook and a hose. The inspection below is the same one a good contractor will run through on a quote visit, and it takes about twenty minutes.
The five-minute visual check
- Look for color shift. Fresh asphalt is near-black; aged asphalt fades to medium gray. Concrete that has never been sealed looks pale and dusty.
- Scan for cracks. Hairline cracks under about a quarter inch are normal wear. Wider cracks, especially in a web pattern, point to deeper issues.
- Check the edges. Driveway edges break down first because they are unsupported, so crumbling along the sides is an early warning.
- Look for stains. Oil and gas that have soaked in leave dark patches. The surface will not hold a sealer well over those spots without prep.
- Test a low spot for standing water. Persistent puddles signal drainage problems that a sealer will not fix.
The water test
Sprinkle water on the surface. On a driveway that still has good protection, the water will bead and roll. On a driveway that is ready for sealing, the water will darken the surface and soak in within a minute or two. This is the most reliable single test for both asphalt and concrete.
Asphalt, concrete, and pavers: one word, three different jobs
Driveway sealing is often talked about as one task, but the right product and process differ sharply by surface. Treating concrete like asphalt, or vice versa, is one of the most common reasons a seal job fails early.
Asphalt driveways
Asphalt is a flexible mix of aggregate and asphalt binder. Over time, sunlight oxidizes the binder and the surface dries out, which is why asphalt lightens and gets brittle. Sealers designed for asphalt are also flexible, usually bitumen- or asphalt-emulsion based, and they restore some of the lost binder. They also add a dark color that many homeowners like for curb appeal.
New asphalt is the exception. A freshly paved driveway needs six to twelve months to cure before any sealer goes down. Sealing too early traps solvents in the mix and can lead to a soft, tacky surface that tracks into the garage.
Concrete driveways
Concrete is rigid and non-flexible. It does not need the same type of coating as asphalt, and a thick asphalt-style sealer will actually make a concrete surface slippery and prone to peeling. Concrete sealers are usually penetrating silane or siloxane products, or film-forming acrylics. They work by soaking into the pores and creating a water-shedding barrier rather than a film on top.
Concrete that is already spalling, scaling, or dusting usually has a moisture or mix problem, and a sealer will only slow the visible damage, not reverse it.
Paver driveways
Concrete or clay pavers are individual units with sand-filled joints. Sealing here serves two roles: stain protection on the surface, and joint stabilization in the gaps. The wrong sealer can trap moisture underneath the pavers and cause white haze, so paver-specific products are worth the small premium.
Choosing the right sealer
Once you have decided your driveway is a good candidate, the next decision is which sealer to use. The four families below cover almost every product you will see at a building supply store or sealcoating contractor.
| Sealer type | Best for | Strengths | Limitations |
|---|---|---|---|
| Asphalt emulsion | Residential asphalt driveways | Flexible, forgiving to apply, low odor | Needs two coats for full coverage; can re-emulsify if applied too thick |
| Coal tar emulsion | Asphalt in cold or wet climates | Strong resistance to fuel, oil, and salt; long track record | Restricted in some regions due to PAHs; strong odor during application |
| Acrylic sealer | Decorative concrete and pavers | UV stable, available in matte or gloss, enhances color | Film-forming, so it can peel if moisture is trapped underneath |
| Penetrating silane or siloxane | Standard broom-finished concrete | Invisible finish, does not change slip characteristics | Little visible effect; needs a dry surface for full penetration |
| Fast-dry sealer | Driveways that need to be back in service quickly | Foot traffic in hours, vehicle traffic the next day | Premium price, narrow application window |
Matching the sealer to your climate
Cold regions with heavy salt use put sealers to the test every winter. Coal tar and acrylic sealers tend to handle chloride exposure well, while plain asphalt emulsion breaks down faster. Hot, sunny climates call for a sealer with strong UV resistance; acrylics and high-quality asphalt emulsions are better choices than basic coal tar products. If you are unsure, a call to your local building department can clarify which chemistries are restricted in your area.
How often you should seal a driveway
The most common homeowner mistake is sealing too often. Every coat adds a thin film, and too many layers can build up into a surface that peels, traps moisture, or feels gummy in summer. The right interval depends on the surface and the product.
| Surface | Typical reseal interval | Signals that it is time |
|---|---|---|
| Asphalt with asphalt-emulsion sealer | Every 2 to 3 years | Faded color, water no longer beads, light surface raveling |
| Asphalt with coal tar sealer | Every 3 to 5 years | Visible wear at the tire tracks, dull finish |
| Concrete with penetrating sealer | Every 5 to 7 years | Water soaks in rather than beading, darkening after rain |
| Concrete with acrylic sealer | Every 2 to 4 years | Patchy gloss, water no longer beads evenly |
| Pavers with joint-stabilizing sealer | Every 3 to 5 years | Joint sand washes out, weeds regrow quickly |
The interval is a guideline, not a schedule. Some driveways go five years between coats, others need attention at eighteen months. The water test is the most honest gauge you have, and it costs nothing but a hose.
Tools and materials you will need
Whether you hire out the work or do it yourself, the inputs are similar. Contractors get better results mainly because they have commercial-grade equipment and have already made every beginner mistake on someone else’s driveway.
For a DIY seal job
- Push broom and stiff bristle brush
- Leaf blower
- Pressure washer with at least 2,500 psi
- Driveway degreaser for oil spots
- Crack filler or cold-pour asphalt repair for cracks wider than a quarter inch
- Asphalt patch compound for any small divots
- Sealant, sized at roughly 4 to 5 gallons per 1,000 square feet per coat
- Squeegee or sealer brush with an extension handle
- Edging brush for the garage lip and walkway borders
- Drum of sealing tape or plastic sheeting for the garage door threshold
- Work boots with soft soles, gloves, and eye protection
For a professional seal job
- Commercial squeegee machine or spray rig
- Hot-pour crack repair equipment
- Sand mix for skim coats on worn asphalt
- Two-part sealer with higher solids content than retail products
Preparing the driveway before any sealer goes down
Prep is where most failed seal jobs are born. A sealer will faithfully lock in whatever is on the surface, so dust, oil, and moisture all need to be addressed. The detailed walkthrough that follows mirrors the step-by-step guidance found in This Old House’s sealcoating guide, which provides useful background for this point.
Clean the surface thoroughly
Sweep or blow off all loose debris. Pull weeds from cracks and edges. Apply a degreaser to every oil spot, let it sit for the time on the label, and agitate with a stiff brush. A pressure washer run at a steady pace lifts embedded dirt and any failed sealer from previous jobs. The driveway needs to dry completely before the next step, which usually means 24 hours of dry weather.
Repair cracks and small damage
Cracks wider than a quarter inch should be filled with a compatible crack filler. For asphalt, cold-pour products in a jug are easy for DIYers, while hot-pour gives a longer-lasting result for professionals. Small potholes or divots get an asphalt patch compound and are tamped smooth. Allow every repair to cure per the product instructions before sealing over it.
Tape and protect edges
Mask the garage door threshold, any pavers or decorative borders that should not be sealed, and the joint where the driveway meets a street or sidewalk. Sealer is much easier to keep off these surfaces than to clean off later.
Applying the sealer
Most residential sealers are applied with a squeegee for asphalt and a roller or sprayer for concrete and pavers. The two-coat rule is the simplest way to get a uniform film: the first coat seals the surface and the second coat gives the body. Trying to do both in one heavy pass leads to puddles that dry soft and to thin spots that dry through.
Application checklist
- Start at the top of the driveway near the garage and work toward the street.
- Pour a ribbon of sealer in small sections, about four to six feet wide.
- Pull the squeegee in long, even passes, slightly overlapping each pass.
- Keep a wet edge; do not let one section dry before the next is started.
- Apply the first coat across the whole surface, then let it dry per the label.
- Apply the second coat perpendicular to the first so coverage is even.
- Block the end of the driveway with cones or caution tape to keep traffic off.
Weather and timing
Sealers need warm, dry conditions to cure. Most asphalt sealers want temperatures above 50 degrees Fahrenheit for 24 to 36 hours, and they do not like direct strong sun on the day of application. Cloudy, dry days in the 60 to 80 degree range are ideal. Concrete penetrating sealers prefer a dry surface but are less fussy about air temperature.
DIY versus hiring a professional
There is no single right answer. The decision is mostly about how much risk you are willing to take, what your time is worth, and what the driveway is worth to you.
| Factor | DIY driveway sealing | Professional sealing |
|---|---|---|
| Material cost for a 1,000 sq ft driveway | Moderate, often $80 to $200 for sealer and prep supplies | Usually bundled into the bid |
| Total cost including labor | Time and a free weekend | Several hundred to over a thousand dollars depending on region |
| Finish quality | Good with careful prep, uneven if rushed | Consistent, commercial-grade equipment |
| Time on the driveway | One to two days of prep, half a day of application | Half a day including prep and two coats |
| Warranty or callback | None | Often one to two years on labor |
| Best fit | Small driveways, tight budgets, hands-on homeowners | Large driveways, owners who want predictable results, busy households |
Homeowners who plan major home projects often find driveway sealing is a good first DIY project because the materials are forgiving, the cost of a mistake is a re-do rather than a structural failure, and the visible result is immediate. For households with cracked or heavily patched driveways, or anyone who has never run a squeegee, the cost of a professional is often recovered in materials not wasted.
Common mistakes that ruin a seal job
Most premature seal failures trace back to a small number of recurring mistakes. Running through this list before you start is a quick way to keep your project on the right side of the average.
- Sealing over a damp surface. Trapped moisture causes whitening, pinholes, and poor adhesion.
- Skipping oil spot prep. Sealer will not bond where oil has soaked in, and the result is peeling.
- Applying one thick coat instead of two thin ones. Thick coats stay soft, crack, and track into the garage.
- Sealing new asphalt too early. Wait the full six to twelve months or you will trap solvents.
- Using the wrong product. Asphalt sealer on concrete and concrete sealer on asphalt are the most common mismatches.
- Ignoring weather. Cool, damp days lengthen cure times and produce a tacky finish.
- Walking or driving on the surface too soon. Most products need 24 to 48 hours before vehicle traffic.
Maintaining a sealed driveway
A sealer does not end the maintenance schedule, it resets the clock. The first year after sealing sets the tone for the next two to three.
- Sweep or blow off leaves and grit weekly during fall.
- Wash the surface two or three times a year with a mild detergent.
- Wipe up oil and fuel drips as soon as you notice them.
- Avoid sharp snow shovels and metal scrapers; use plastic-edged tools and a roof rake for heavy snow.
- Set a calendar reminder to walk the surface each spring and run the water test.
How driveway sealing fits into broader home upkeep
Driveways tend to get attention only when something is obviously wrong, but the same seasonal rhythm that handles the rest of the home applies. A short annual walk-through in spring covers the driveway, the garage door hardware, and any exposed exterior wood or concrete. Pairing the seal job with a quick check of items like the sewer line cleanout and the garage threshold keeps the small problems from stacking up into one big repair bill later. When the seal job is done well, the next visit to the driveway is two or three years away, and the focus shifts to the next part of the property that needs a quiet hour of attention.
Frequently asked questions
How long does driveway sealing last?
Most residential sealers last two to three years on asphalt and three to five years on concrete and pavers, depending on traffic, climate, and product. The water test is the simplest way to check whether it is time to reseal: if water darkens the surface and soaks in rather than beading, the protection is gone.
Can you seal a driveway in cool weather?
Cool weather lengthens cure times and can lead to a soft or hazy finish. Most asphalt sealers want air and surface temperatures above 50 degrees Fahrenheit for the full curing window, usually 24 to 36 hours. Concrete penetrating sealers are less fussy, but the surface still has to be dry.
What is the best time of year to seal a driveway?
For most of the country, late spring through early fall offers the most reliable conditions. A dry forecast with temperatures in the 60 to 80 degree range and a couple of days without rain is ideal. In hot climates, a slightly cooler morning avoids flash drying on the surface.
How much does professional driveway sealing cost?
Pricing varies by region and driveway size, but a typical single-car driveway might run a few hundred dollars, while a large two- or three-car driveway can reach four figures. The biggest cost drivers are square footage, the number of cracks to fill, and whether a primer coat is needed.
Do I need to seal a brand new asphalt driveway?
No, not right away. Fresh asphalt needs six to twelve months to cure, depending on climate and mix. Sealing too early traps solvents in the surface and can lead to soft, gummy areas that mark easily. After the first year, the water test will tell you when a first seal coat is worth it.
Can I put driveway sealer over a concrete driveway?
You can, but you should use a product designed for concrete. Asphalt sealers on concrete often go on cloudy and peel within a season. Penetrating silane or siloxane sealers are usually the best choice for standard concrete, while decorative or colored concrete often calls for an acrylic sealer.
Is coal tar sealer banned?
Some municipalities and states restrict coal tar sealers because of concerns about polycyclic aromatic hydrocarbons washing into storm drains. Before buying or applying a coal tar product, check with your local public works or environmental agency to confirm it is allowed in your area.
How long before I can drive on a sealed driveway?
Most residential sealers allow foot traffic after 24 hours and vehicle traffic after 48 hours, although fast-dry products can shorten that window. Cool or humid weather can add several hours to the cure, so plan to keep cars off the surface for a full day after the recommended window just to be safe.
Will driveway sealing cover oil stains?
Sealer will darken the surface and make some stains less visible, but it will not hide a deep oil stain that has soaked into the asphalt. For the sealer to bond well over a stained area, the spot needs to be cleaned with a degreaser first. Any stain that still shows through after cleaning will still be visible after sealing.
What is the difference between sealing and resurfacing a driveway?
Sealing is a thin protective coating laid on top of an existing surface that is still in reasonable condition. Resurfacing is a structural repair in which a new layer of asphalt, usually one to two inches thick, is installed over the old surface. Sealing is a maintenance task done every few years; resurfacing is a larger project done every ten to fifteen years on driveways that are aging but not yet failing.
Leave a Reply