
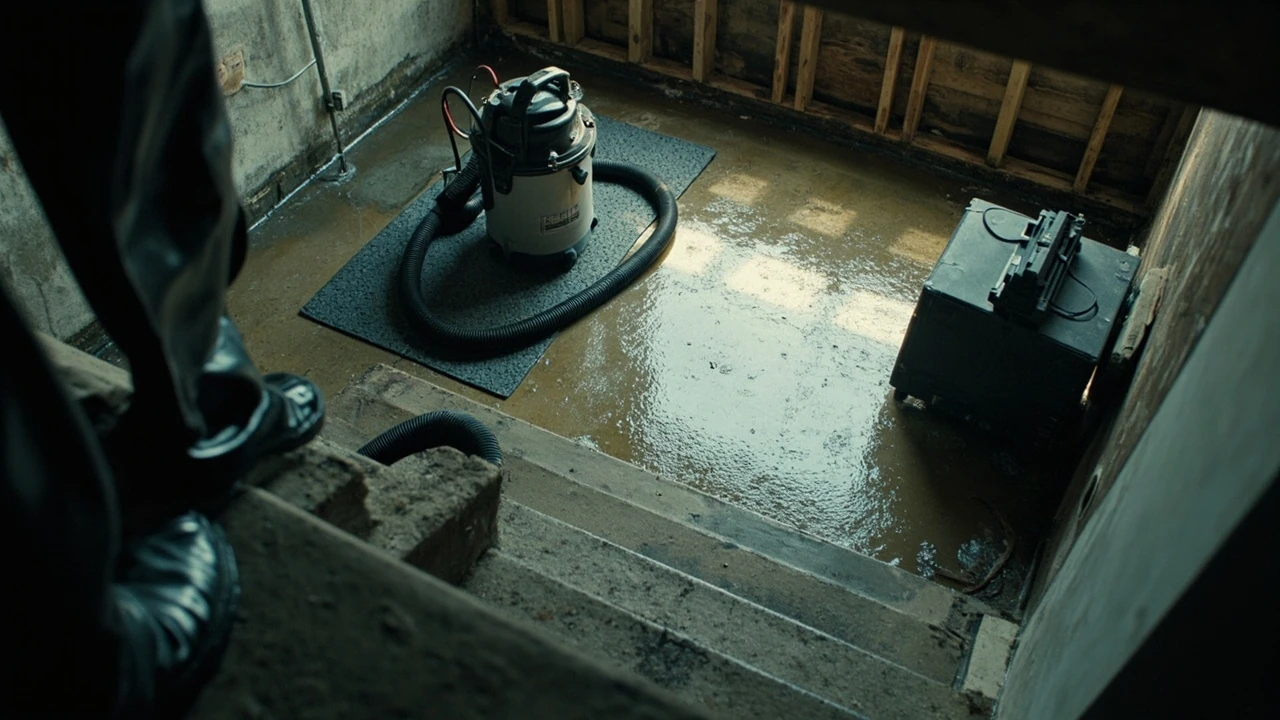
Basement flood cleanup: a practical homeowner guide
Two inches of water across a basement floor is enough to ruin carpet pad, swell MDF baseboards, short out a furnace, and push a homeowner into a long, expensive recovery. Most of the damage is not the water you can see. It is the moisture that soaks into drywall, subfloor, framing, and stored belongings, where it quietly feeds mold growth for weeks. Basement flood cleanup is the work of pulling that moisture out, sanitizing what the water touched, and deciding what to keep, what to dry, and what to cut out and replace.
This guide walks through the order of operations a careful homeowner or contractor follows after a flood event. It starts with the safety decisions that protect you from electrical shock and contaminated water, then moves through water removal, structural drying, cleaning, and the smaller repair decisions that decide whether your basement returns to normal or keeps smelling musty six months later.
What counts as a flooded basement
Insurers and restoration companies tend to treat any unintended water in a basement as a flood event, even if the volume is small. A few common situations qualify:
- A sump pump that loses power during a storm and the pit overflows onto the floor.
- A burst washing machine supply line, water heater, or utility sink that drains into a basement drain that backs up.
- Sewer backup through a floor drain during heavy rain, which brings Category 3 (black water) contamination.
- Seepage through cove joints or wall cracks after sustained rainfall or rapid snowmelt.
- Foundation drain failure or a failed exterior waterproofing membrane.
The source matters as much as the volume. Clean water from a supply line break is treated very differently from water that has touched the soil outside your foundation or risen up through a sewer line. Before you start moving things around, identify what filled the basement, because the cleanup protocol, the protective gear, and the disposal rules all change based on that source.
Safety decisions to make in the first hour
Floodwater in a basement is not the same as a spill in a kitchen. It can hide energized wiring under the waterline, contaminate the air with mold spores and bacteria, and shift the structural load on a wood floor system. Treat the first hour as a safety exercise, not a cleaning exercise.
Shut off power to the basement before anyone walks into standing water. If your electrical panel is on the main floor, you can usually do this from the breaker labeled “basement” or by switching the main breaker off. If the panel is in the basement itself, call an electrician and wait. The Roto-Rooter basement flood cleanup guide echoes the same caution, noting that any electronics in contact with floodwater should be considered unsafe until a qualified person has checked them.
Once the power question is settled, think about the water itself. If it came from a clean supply line and stayed clean, the protective equipment is gloves, boots, and a dust mask. If it came from a drain, a sump, the soil, or a river, treat it as Category 3 water. That means full waterproof gloves, rubber boots you can disinfect, eye protection, an N95 or P100 respirator, and no skin contact. Children, pregnant people, and anyone with a compromised immune system should stay out of the space until it has been cleaned and disinfected.
Two more checks before you start moving equipment: confirm that the gas service to a basement furnace or water heater is off at the appliance valve, and listen for the sound of running water. If a pipe is still leaking, every minute you spend pumping is wasted.
Document the damage for your insurance claim
Cleanup and documentation happen at the same time. Insurers expect a clear record of what was damaged, how much water was present, and what you did to mitigate further loss. Take photos and short videos before you start removing anything. Capture wide shots of each affected room, close-ups of standing water against walls, and clear images of damaged items in place.
Make a written inventory as you go. Group items by room and list quantity, approximate age, and condition. For major appliances, note the make and model, which you can usually find on a data plate. Save any receipts for emergency equipment, plumber visits, or restoration work; most homeowner policies reimburse reasonable mitigation costs even before the claim is settled.
Call your insurance company as soon as you have a safe entry. Most standard homeowner policies cover sudden and accidental water damage from inside the home, but they generally exclude flood damage from outside water. Coverage for sewer backup and overland flooding usually requires an endorsement. Knowing which policy you are working under shapes whether professional restoration is a covered expense or an out-of-pocket decision.
Remove standing water
Once the space is safe, the goal is to get standing water out as fast as possible. The longer water sits, the deeper it wicks into porous materials and the more secondary damage it causes.
| Water depth | Best tool | Notes |
|---|---|---|
| Less than 1 inch | Wet-dry shop vacuum | Works only for short durations. Empty the tank frequently so the motor does not burn out. |
| 1 to 4 inches | Submersible utility pump | Pair with a garden hose run to a floor drain outside. Keep the pump’s intake off the floor to avoid silt. |
| Over 4 inches | Trash pump or professional extraction | Trash pumps move higher volumes but require a 2-inch discharge line and a safe outdoor discharge point. |
| Carpet over pad | Carpet extractor or professional | Pad usually has to be removed and discarded because drying is rarely complete. |
Discharge the water somewhere that will not bring it right back. A garden hose run to a driveway that slopes away from the foundation, a storm drain, or a low spot in the yard works for short events. Do not send sump water into a sanitary sewer unless your local utility explicitly allows it; many jurisdictions prohibit it and will fine homeowners for the discharge.
If the water reached the furnace, water heater, washer, dryer, or any appliance with a motor, leave those appliances powered off until they have been inspected. A motor that ran submerged can be a fire hazard when it is re-energized. Water heaters and gas furnaces should be serviced by a licensed technician before they are turned back on.
Pull wet materials out of the basement
After the standing water is gone, the next step is to remove anything that will not dry inside 48 to 72 hours. The faster you get these materials out of the basement, the faster the structure can dry and the lower the chance of mold.
- Carpet and pad. Pad acts like a sponge. Even if the carpet looks fine, the pad usually has to be cut out and discarded. The carpet itself can sometimes be lifted, cleaned, and reinstalled after professional drying.
- Drywall. Standard paper-faced drywall wicks water several inches up the wall. Restoration pros remove drywall at least 12 inches above the highest waterline, sometimes 24 inches for prolonged flooding. Mold-resistant drywall and cement board are different stories, but most basements have paper-faced gypsum.
- Insulation. Fiberglass batt insulation loses its R-value when soaked and holds moisture against framing. Remove it. Closed-cell spray foam can usually stay if it was not physically damaged.
- Baseboards and trim. These can often be saved if removed carefully and dried off-site. MDF baseboards typically have to be replaced.
- Cardboard boxes, paper, and particleboard furniture. Anything that swells, delaminates, or feeds mold growth should go.
Bag debris in heavy contractor bags and dispose of it through your regular waste service. Wet carpet and pad that came in contact with Category 3 water usually needs to be handled as contaminated waste; check with your local health department if you are unsure.
Dry the structure
Structural drying is what most homeowners underestimate. After the visible water is gone, the framing, subfloor, and concrete are still wet. A dehumidifier alone is rarely fast enough. Professional restorers use a combination of air movement, dehumidification, and sometimes heat to pull moisture out of building materials before mold can establish itself.
| Drying tool | What it does | Where it helps most |
|---|---|---|
| Low-grain refrigerant dehumidifier | Removes water vapor from the air at a rate a homeowner unit cannot match | Any sealed-off basement space |
| Desiccant dehumidifier | Pulls moisture out of the air even at low temperatures | Unheated basements in cool weather |
| Axial air movers (carpet fans) | Push air across wet surfaces to speed evaporation | Wet framing, subfloor, concrete |
| Centrifugal air mover | Higher static pressure, good for wall and ceiling cavities | Behind removed drywall |
| Floor and wall mat systems | Extract water from hardwood or concrete subfloor | Basements with engineered wood flooring |
For a typical residential basement, a serious DIY setup is two or three carpet fans, one large dehumidifier (50 to 70 pints per day capacity or more for a basement), and a way to close off the space from the rest of the house so the equipment is not drying your living room. Close basement windows and doors. Run the equipment 24 hours a day. Plan on three to seven days of active drying for clean water and longer for contaminated water.
Use a pin-type or pinless moisture meter to track progress. Check the bottom of wall studs, subfloor edges, and any wood that was in standing water. Readings should return to within a few percentage points of an unaffected piece of the same material before you close the basement back up. If you do not own a meter, restoration companies will place one for free or for a small fee as part of an estimate.
Clean and sanitize surfaces
After the structure is dry, every surface the water touched has to be cleaned and sanitized. The goal is to remove silt, reduce microbial contamination, and leave behind a surface that will not off-gas or feed mold growth.
For clean water events, a general-purpose household cleaner followed by a disinfectant such as a dilute bleach solution (about one cup of unscented household bleach per gallon of water) is enough for hard, non-porous surfaces. Apply the disinfectant, let it sit for several minutes, then rinse and dry. Do not mix bleach with ammonia or any other cleaner; the resulting fumes are dangerous.
For Category 3 water (sewer backup, floodwater from outside, or any water that has sat long enough to support bacterial growth), the protocol is stricter. Porous materials that cannot be effectively cleaned have to be removed and discarded. Hard surfaces need to be cleaned, then disinfected with an EPA-registered product labeled for sewage or Category 3 water. The CDC’s guidance on mold and moisture problems after flooding is a useful reference for understanding why thorough cleaning matters even when surfaces look clean.
Concrete basement walls and floors can usually be cleaned in place. Scrub them with a stiff brush and a detergent solution, rinse thoroughly, then apply a disinfectant. After they dry, you can seal minor cracks with hydraulic cement and consider a masonry sealer if the basement has a chronic dampness problem.
Decide what to repair, replace, or restore
With the basement dry, clean, and disinfected, you are left with a list of decisions about what to put back. A few common calls:
- Drywall. Replace removed sections with new paper-faced or mold-resistant drywall, tape, mud, sand, prime, and paint. Use a primer designed for new drywall so the paint covers evenly.
- Flooring. Vinyl tile, ceramic tile, and sealed concrete usually survive a clean flood. Engineered wood and laminate usually do not. Solid hardwood can sometimes be saved by a professional drying service if the boards have not cupped too badly.
- Electrical. Have a licensed electrician check any outlet, switch, junction box, or appliance that was submerged. Replace standard outlets; GFCI outlets can sometimes be reset and reused after drying.
- HVAC. A furnace or air handler that took on water needs a technician’s sign-off. The blower motor, control board, and heat exchanger all have to be inspected. Ductwork that held water usually has to be replaced or professionally cleaned.
- Contents. Upholstered furniture, mattresses, and items that cannot be disinfected should be discarded after Category 3 water exposure. Hard toys, metal tools, and glassware can be cleaned and disinfected.
A simple rule of thumb: if an item is porous and the water was contaminated, replace it. If an item is hard and non-porous and the water was clean, clean and disinfect it. Everything in between is a judgment call you make based on replacement cost, sentimental value, and the level of contamination.
Prevent the next flood
Cleanup is only half the job. The other half is making sure the next storm does not put you back in the same position. A few high-impact changes catch most of the recurring problems:
- Sump pump. Install a primary pump with a battery backup or a water-powered backup if you have municipal water. Test the pump annually by pouring water into the pit. Replace pumps every 7 to 10 years.
- Discharge line. Run the sump discharge at least 10 feet away from the foundation and onto ground that slopes away from the house. Add a check valve to the line so water cannot flow back into the pit.
- Gutters and downspouts. Clean them twice a year. Make sure downspouts discharge at least 4 to 6 feet from the foundation. Splash blocks or buried drain lines help on tight lots.
- Grading. The soil around the foundation should slope away at a 6-inch drop over the first 10 feet. Settled landscaping is a common cause of seepage through cove joints.
- Floor drain check. Pour water down the floor drain to confirm it flows. If it backs up, you may have a sewer line problem, not a flood problem.
- Backwater valve. If sewer backup is the recurring issue, a plumber can install a backwater valve on the main line to prevent municipal surges from entering the basement.
A smart strategy is to combine small habits with one or two structural investments. Cleaning gutters is cheap. Adding a battery backup sump pump or regrading a settled side yard costs more but removes a recurring failure mode.
When to call a professional
DIY cleanup is realistic for clean water events that are caught early, are limited to part of the basement, and do not involve drywall or insulation. The Roto-Rooter overview of basement flood cleanup service describes the same boundaries: removing standing water, drying the space, and sanitizing hard surfaces are within a homeowner’s reach when conditions allow.
Bring in a restoration company when any of the following is true:
- The flood involved sewer backup or outside water.
- Water sat for more than 24 to 48 hours before cleanup began.
- The basement is finished with drywall, carpet, or built-in furniture.
- There is visible mold growth or a strong musty odor after drying.
- The HVAC system, electrical panel, or gas appliances were submerged.
- Your insurance company is covering the loss and requires documentation from a certified firm.
Look for a firm that holds an IICRC certification in water damage restoration, can deploy within a few hours, and uses psychrometric monitoring (temperature and humidity readings) to verify drying rather than guessing. A written scope of work, daily moisture readings, and a final walkthrough are standard.
Costs, timelines, and what to expect
Every flood is different, but a few ranges help with planning. For a clean water event in an unfinished basement, a DIY cleanup with rented equipment usually runs a few hundred dollars in equipment rental and a weekend of work. The same job done by a professional firm typically falls between $1,500 and $4,000 for a 500 to 1,000 square foot basement, depending on the depth of water and the length of drying time.
Adding Category 3 contamination, demolition of drywall, or removal of carpet and pad roughly doubles the cost. A full restoration of a finished basement, including drywall replacement, flooring, paint, and electrical checks, can run $10,000 to $25,000 or more depending on finishes and the extent of the damage. Insurance coverage varies widely, and out-of-pocket costs depend on your deductible, your policy limits, and whether you carry flood or sewer backup endorsements.
Timelines follow a similar pattern:
- Day 1: water removal, demolition of unsalvageable materials, equipment setup.
- Days 2 to 7: active drying, daily monitoring, cleaning and sanitizing once materials reach target moisture content.
- Week 2: deodorizing, sealing, final cleaning, repair planning.
- Weeks 3 to 6: rebuild phase, including drywall, paint, flooring, and electrical sign-offs.
Sticking to that timeline is what keeps a one-time flood from becoming a long-term mold problem. Rushing the drying phase is the most common mistake homeowners make, and the one that costs the most in the long run.
A short checklist before you start
Before you pull on the rubber boots, run through this list. It is not a substitute for professional advice, but it keeps the first hour organized.
- Confirm power to the basement is off at the breaker or by an electrician.
- Confirm the gas valve on basement appliances is off.
- Identify the water source and classify it as clean, gray, or black.
- Document the damage with photos and a written inventory.
- Call your insurance company and report the loss.
- Wear the right protective gear for the water category.
- Remove standing water with a pump or wet-dry vac.
- Pull out wet carpet, pad, drywall, and insulation above the waterline.
- Set up fans and a dehumidifier; close off the basement.
- Clean and disinfect hard surfaces after drying is complete.
- Schedule inspections for any electrical, gas, or HVAC equipment that was submerged.
The first hour after a flood sets the tone for the rest of the recovery. Treat the basement as a job site, not a storage room, and the rest of the work becomes a sequence of straightforward decisions rather than a string of expensive surprises.
Frequently asked questions
How long does basement flood cleanup usually take?
For a clean water event in an unfinished basement, active drying takes three to seven days. Add demolition and rebuild, and the full project usually runs two to six weeks. Sewer backup or outside floodwater extends drying time and adds demolition, so the total can stretch to a month or more.
Is a flooded basement covered by homeowners insurance?
Standard homeowner policies usually cover sudden and accidental water damage from inside the home, such as a burst pipe or a failed water heater. They typically do not cover water that enters from outside unless you carry a separate flood policy or a sewer backup endorsement. Coverage depends on the source of the water and the specific policy, so check with your insurer before starting major work.
Do I need to replace drywall after a basement flood?
Paper-faced drywall that absorbed floodwater usually has to be removed at least 12 inches above the highest waterline and replaced. Closed-cell spray foam and cement board can often stay in place if they were not physically damaged. When in doubt, cut a small inspection hole to see how far moisture wicked up the wall.
Can I keep wet carpet after a flood?
The carpet itself can sometimes be saved by a professional cleaning and drying service, but the pad almost always has to be replaced. If the water was from a sewer backup or outside source, both carpet and pad should be discarded for health reasons.
When is it safe to use electricity in a flooded basement?
Electricity should stay off until a licensed electrician has inspected any outlets, switches, breakers, and appliances that were submerged. Standard outlets should be replaced. GFCI outlets can sometimes be reused after drying, but only after testing. Never energize a wet electrical panel yourself.
What is the difference between clean water, gray water, and black water?
Clean water comes from a sanitary source such as a supply line. Gray water has been used for a purpose but does not contain sewage, such as water from a dishwasher. Black water is contaminated with sewage or outside floodwater and requires stricter protective equipment, more aggressive cleaning, and disposal of porous materials that cannot be disinfected.
Can I stay in the house while the basement is being dried?
Yes, in most cases. Close off the basement from the rest of the house, run the drying equipment continuously, and keep the HVAC set to recirculate if possible. If the flood involved contaminated water, sensitive individuals should stay out of the basement until cleanup is complete and air quality has been tested.
How do I prevent mold after a basement flood?
Remove water within 24 to 48 hours, pull out wet porous materials, dry the structure with fans and a dehumidifier, and disinfect hard surfaces. Monitor moisture content with a meter and do not close up walls or lay new flooring until framing and subfloor are back to normal moisture levels.
Should I run a dehumidifier after the basement is dry?
Yes, especially in humid climates or during the summer. A basement that is naturally damp will return to high humidity quickly after drying, and that is the condition mold needs to grow. Running a dehumidifier set to 50 percent relative humidity is a low-cost way to keep the space stable.
Is it worth installing a battery backup sump pump?
For most homes with a sump pit, yes. Power failures are a common cause of sump-related flooding, and a battery or water-powered backup pump is a relatively small investment compared with the cost of another flood. Test the backup pump annually, the same way you test the primary pump.
Leave a Reply