
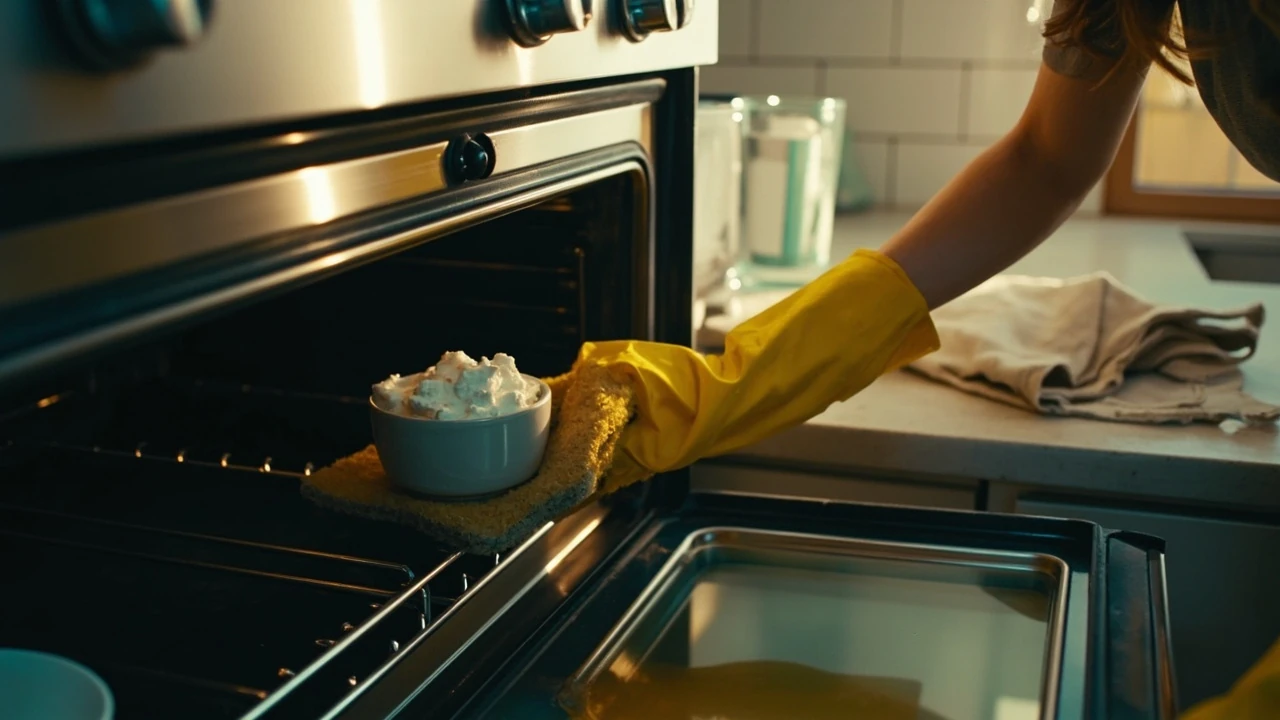
How to clean oven without scratching the glass or damaging the seal
A roasted chicken left the glass on the oven door streaked with fat, and the weekend cleanup suddenly turned into a longer project than expected. Most homeowners face the same problem: grease hardens, smoke odors linger, and the heating element quietly collects drips that burn on during the next use. The good news is that an oven does not need harsh chemicals to look and smell fresh again, and the method you choose can be matched to the type of oven you own and the mess you actually have.
This guide walks through how to clean oven surfaces, racks, glass, and heating elements using methods that work for standard, convection, steam-assisted, and pyrolytic self-cleaning models. You will see which products are worth buying, which ones are interchangeable, and where the real risks are. The same steps used by appliance technicians and cleaning services are broken down here so a homeowner can do the work safely, without damaging enamel or voiding a warranty.
Decide on a cleaning method that matches the mess
The fastest path to a clean oven is to match the cleaning method to the type of residue and the type of oven. A light film of grease after a week of roasting responds to a quick baking soda paste. A year of baked-on spills and smoke residue usually needs a longer soak or a high-temperature cycle. Using the wrong method wastes time, leaves streaks, or damages the porcelain enamel that protects the oven cavity.
Three common cleaning approaches
- Baking soda paste: A mild alkali that breaks down grease without scratching enamel, glass, or metal trim. Safe for monthly maintenance cleaning on most ovens.
- Steam softening: A pan of hot water with a small amount of dish soap creates a low-temperature steam that loosens spills. Best for fresh spills and households that want to avoid chemical residue.
- Self-cleaning or pyrolytic cycle: An oven feature that heats the cavity to around 932 degrees Fahrenheit (500 degrees Celsius) and reduces spills to ash. Limited to ovens that have the feature and owners comfortable with the cycle time and energy use.
Match the residue to the method
| Type of residue | Best method | Estimated effort | Cautions |
|---|---|---|---|
| Light grease film | Baking soda paste, wipe after 15 minutes | 20 minutes | Avoid steel wool on glass or enamel |
| Moderate baked-on spills | Steam soften, then baking soda scrub | 45 minutes | Do not soak heating elements or fan motors |
| Heavy carbon buildup | Pyrolytic self-cleaning cycle | 3 to 4 hours total | Remove racks first; ventilate the kitchen |
| Smoke odor after a spillover | Steam plus baking soda, then dry heat | 1 to 2 hours | Check the owner’s manual for recommended temperatures |
Gather what you need before you start
Walking back and forth to the kitchen sink in the middle of a cleaning session is one of the most common reasons a job gets abandoned halfway. Setting up a small station in front of the oven with everything within reach keeps the process efficient. Most of the supplies are already in a typical home, and specialty items are inexpensive at any hardware or grocery store.
Tools and supplies checklist
- Microfiber cloths, at least three, reserved for oven use only.
- A non-scratch scrubbing pad such as a blue Scotch-Brite or a similar nylon pad.
- Arm and Hammer baking soda, roughly one cup per cleaning session.
- White vinegar in a spray bottle for rinsing and neutralizing baking soda.
- Dawn or another grease-cutting dish soap, a few drops for steam cleaning.
- A plastic or silicone spatula to lift softened residue without scratching.
- An oven-safe dish or sheet pan for the steam method.
- Heavy rubber gloves, the kind used for dishwashing, to protect hands from degreasing agents.
What to avoid
- Steel wool, which can leave permanent marks on porcelain enamel and oven glass.
- Bleach-based products, which can corrode aluminum trim and damage heating elements.
- Aerosol oven cleaners in self-cleaning ovens, since the high-heat cycle can bake residues into the cavity.
- Spraying any liquid directly into a fan vent, heating element, or door gasket.
Step-by-step process for a standard interior clean
For most homeowners, the standard method combines a baking soda paste with a steam softening step. The paste does the chemical work of breaking down fats, the steam loosens what the paste cannot reach, and a careful wipe leaves the enamel close to its original finish. Working from the top down keeps drips from settling on already-cleaned surfaces.
Step 1: Remove the racks and prepare the oven
Pull the racks out and set them aside on a folded towel. They will be cleaned separately, and keeping them out of the oven gives full access to the floor and side walls. If the oven has a visible fan, take a moment to look for any large chunks of food sitting on the fan cover. Pick these up by hand or with tongs so they do not ignite during a high-heat cycle later.
Step 2: Make and apply the baking soda paste
Mix roughly three parts baking soda with one part water in a small bowl. The paste should spread easily but stay thick enough to cling to a vertical surface. A useful test: if the paste drips off a spoon, it is too thin; if it crumbles, it is too dry. Coat the interior walls, the floor, the inside of the door, and the glass, avoiding the heating elements and any visible fan motor.
Step 3: Let the paste sit, then spray with vinegar
Allow the paste to sit for at least 15 minutes, longer for heavy grease. A light spray of white vinegar over the paste creates a gentle fizzing reaction that helps lift residue. The combination of a mild alkali (baking soda) and a mild acid (vinegar) is effective on fresh grease without the fumes of a commercial degreaser.
Step 4: Wipe and rinse
Using a damp microfiber cloth, wipe the dissolved grease from the oven walls. Rinse the cloth frequently and avoid letting dirty water run into the door gasket, the area where the door seals against the oven body. A wet gasket can trap moisture and cause odor problems, so it should be dried with a clean cloth before the oven is used again.
Step 5: Address the inside of the glass door
Many oven doors have two or three layers of glass with a gap between them. If grease has migrated into that gap, the door may need to be partially disassembled. In most cases, however, a paste of baking soda applied with a non-scratch pad and then wiped clean will handle the inside of the door without disassembly. Stubborn haze on the inner glass can be removed with a small amount of Bar Keepers Friend or a similar oxalic acid cleaner, used sparingly and rinsed thoroughly.
Step 6: Replace the racks only when the oven is dry
Sliding wet racks into a dry oven can leave water marks and slow the next preheat. Allow at least 30 minutes of air drying or run the oven at a low temperature of about 200 degrees Fahrenheit for 10 minutes to drive off moisture. Both the cavity and the racks should feel room temperature and dry to the touch before the oven is used for cooking.
How to clean oven racks without scratching the chrome
Chrome-plated racks are the most common type in household ovens, and they are easy to damage with the wrong scrubber. They also collect baked-on grease in the corners where the bars meet the support frame, which is the hardest area to reach. A soak in a bathtub or a large plastic tub is the simplest method for most homeowners.
Soak method using a bathtub or utility tub
- Line the tub with an old towel to keep the racks from scratching the surface.
- Place the racks in the tub and add hot water until they are fully submerged.
- Add half a cup of dishwasher detergent, or a few drops of dish soap, and stir to dissolve.
- Let the racks soak for at least four hours, or overnight for heavy buildup.
- Scrub with a non-scratch pad and rinse with clean water.
- Dry thoroughly with a microfiber cloth before returning them to the oven.
Quick soak in a large garbage bag
For homeowners without a bathtub or utility sink, a heavy-duty garbage bag and a bathtub stopper work nearly as well. Place each rack in a separate bag, add two cups of hot water and two tablespoons of ammonia, seal the bag, and leave it outdoors or in a garage for several hours. Ammonia fumes are strong, so this method should never be used in an enclosed kitchen or near children or pets. After soaking, scrub, rinse, and dry the racks as described above.
When the self-cleaning cycle is the better choice
A self-cleaning cycle is not necessary for every homeowner, but for ovens that have the feature, it is often the lowest-effort way to handle years of baked-on residue. The pyrolytic process is described in detail on the English Wikipedia article on self-cleaning ovens, which notes that pyrolytic cycles heat the cavity to roughly 500 degrees Celsius and reduce food residue to ash. Because of the high heat, the oven door is mechanically locked during the cycle, and the kitchen needs to be ventilated while the cycle runs.
Before running a self-cleaning cycle
- Remove all racks, unless the owner’s manual specifically says they can stay in place.
- Wipe up any large chunks of food from the floor of the oven so they do not ignite.
- Cover nearby smoke detectors with a plastic bag and remove it immediately after the cycle ends.
- Keep the kitchen well ventilated, since the cycle can produce smoke and odor.
After the cycle ends
Let the oven cool completely before opening the door. Most self-cleaning ovens stay locked until the cavity temperature drops to around 600 degrees Fahrenheit (316 degrees Celsius), but full cooling to room temperature takes several more hours. Once cool, wipe the ash from the floor and walls with a damp cloth. The enamel should look close to new, and a light buffing with a dry microfiber cloth removes any remaining dust.
Energy use and household impact
A typical pyrolytic cycle lasts about 150 minutes and consumes more than 3 kilowatt-hours of electricity, according to industry estimates summarized in the Wikipedia entry on self-cleaning ovens. That is roughly the energy used by a standard dishwasher running two loads, and it is a fair comparison when weighing whether to use the feature. Households that cook frequently may find a monthly cycle useful, while occasional bakers may do better with manual cleaning every few months.
Steam cleaning for owners who want a low-heat option
Some newer ovens include a steam-cleaning function that uses water and low heat to soften residue, rather than the high heat of a pyrolytic cycle. For ovens without the feature, a manual steam method is a reasonable substitute. The approach is similar across brands, and the goal is to loosen, not burn, baked-on food.
Manual steam method
- Place an oven-safe dish on the lowest rack.
- Fill the dish with two cups of water and a few drops of dish soap.
- Heat the oven to 250 degrees Fahrenheit for 20 to 30 minutes.
- Turn off the oven and let the dish cool for 10 minutes with the door closed.
- Open the door and wipe softened residue with a damp cloth.
The hot water and soap mixture condenses on the oven walls, softening grease and sugar spills so they wipe away without scrubbing. This method is gentle enough to use weekly on lightly soiled ovens, and it is a useful follow-up to a deeper cleaning session.
Cleaning the outside of the oven without streaking
The same care used on the inside should be used on the oven’s exterior, but the surfaces and risks are different. Stainless steel shows streaks easily, painted finishes can discolor with the wrong solvent, and glass control panels should never be sprayed directly. A small adjustment in technique keeps the outside looking as new as the inside.
Stainless steel surfaces
Wipe in the direction of the grain with a soft cloth dampened with a small amount of dish soap. Dry immediately with a second cloth to avoid water spots. For fingerprints, a spray of glass cleaner on a cloth (not on the steel) is usually enough. Specialty stainless steel polishes are optional and can add shine, but a basic soap-and-water routine is sufficient for most households.
Glass control panels and touchscreens
Use a dry or barely damp microfiber cloth, and avoid any cleaner that contains ammonia or bleach. Many control panels are not sealed against liquid, and a small amount of moisture that seeps under the glass can damage the electronics. For sticky residue around knobs or buttons, a cotton swab lightly dampened with isopropyl alcohol is usually enough.
Door handle and knobs
The door handle is one of the most touched surfaces in the kitchen, and it is easy to overlook during cleaning. Wipe it with a disinfecting wipe or a cloth dampened with diluted all-purpose cleaner, then dry. Plastic or painted knobs can discolor if a strong solvent is used, so it is worth checking the owner’s manual for the manufacturer’s recommendation before applying any commercial product.
How often to clean, and how to keep the oven cleaner between deep cleans
How often to clean an oven depends on how often it is used and what is cooked in it. Roasting at high temperatures and broiling leave more residue than low-temperature baking. A useful rule of thumb is a quick wipe-down after every heavy use and a deeper cleaning every two to three months for frequent cooks, or every six months for occasional bakers.
Daily and weekly habits that reduce buildup
- Wipe spills as soon as the oven has cooled enough to touch safely.
- Use a sheet pan or roasting pan with high sides to catch drips, especially under poultry or fatty cuts of meat.
- Line the oven floor with a non-stick oven liner approved by the manufacturer, and replace it every few months.
- Run the exhaust fan or open a window while cooking to reduce the amount of grease that settles back into the oven.
A simple schedule for most households
| Frequency | Action | Best for |
|---|---|---|
| After every use | Wipe floor and door glass with a damp cloth | Light splatter and steam |
| Weekly | Wipe racks with a soapy cloth | Light grease |
| Monthly | Apply baking soda paste and wipe clean | Moderate buildup |
| Every 3 to 6 months | Soak racks and clean door glass in detail | Heavy cooks, broiling, roasting |
| Yearly | Run pyrolytic cycle if available | Self-cleaning ovens with stubborn residue |
Safety reminders that prevent damage and injury
Cleaning an oven is straightforward, but a few safety rules apply regardless of method. The oven is an electrical appliance with hot surfaces, a door gasket that should not be soaked, and sometimes a halogen or heating element that is sensitive to liquid. Following a few habits protects both the oven and the person cleaning it.
Electrical and heat safety
- Turn off the oven and allow it to cool completely before any cleaning, except for the steam method, which uses low heat on purpose.
- Unplug the range if cleaning the back of the control panel or any area near wiring.
- Do not pour water on a heating element, halogen bulb, or visible fan motor.
- Never mix ammonia and bleach, since the combination produces toxic chloramine gas.
Chemical and ventilation safety
- Open a window or run the kitchen exhaust fan whenever using a strong-smelling product.
- Wear rubber gloves to protect hands from degreasing agents, even mild ones.
- Keep cleaning supplies out of reach of children and pets, especially ammonia and commercial oven cleaners.
- Store oven cleaning supplies separately from food, in a labeled container if they have been transferred from their original packaging.
Troubleshooting common oven cleaning problems
Even with the right method, a few stubborn problems can show up. The most common are streaks on the door glass, a lingering smoke smell, and discoloration on the enamel. Each has a clear cause and a clear fix once the source is identified.
Streaks on the inside of the door glass
Streaks that do not come off with a baking soda paste are usually mineral deposits from steam during cooking. A small amount of white vinegar on a cloth, wiped in a circular motion and then buffed dry, often removes them. If the streaks remain, the residue may be between the glass panels, and a service technician may need to disassemble the door. Most doors can be taken apart by a homeowner with basic tools, but the manufacturer’s instructions should be followed to avoid breaking the glass or damaging the hinge.
Smoke smell that lingers after a clean
A smoke smell after cleaning is usually a sign that residue is still present in a hidden area, often around the fan or the back wall. Wiping those areas with a damp cloth and running a short, high-temperature cycle of 400 degrees Fahrenheit for 20 minutes with the kitchen ventilated can help burn off remaining residue. If the smell persists, the door gasket may have absorbed grease, and a replacement gasket is usually inexpensive and easy to install.
Discoloration on the enamel
Permanent discoloration on porcelain enamel is rare, but it can happen after years of high-heat use. Light surface staining is normal and is not a sign of damage. A paste of baking soda and hydrogen peroxide, left on the stain for 15 minutes and wiped clean, can lighten most discoloration. A complete enamel replacement is not practical, and a discolored oven is usually safe to use as long as the enamel is not flaking or cracked.
When to call a service technician
Most oven cleaning is a homeowner task, but there are a few cases where a service technician is the better choice. If the oven door will not unlock after a self-cleaning cycle, the gasket has torn, the heating element shows visible damage, or the fan motor makes unusual noises, a professional should be called. A service visit is also worthwhile for very old ovens where the porcelain enamel is flaking, since loose enamel can end up in food.
For homeowners planning a kitchen remodel, professional cleaning of the existing oven is often part of a larger pre-move checklist. If the remodel is the reason for the deep clean, the team handling the project can coordinate the appliance work with cabinet and counter installation. The home remodeling contractors guide from Blue Hammer Build walks through how to plan that kind of project in a way that keeps the kitchen usable while work is underway.
Putting the routine together
A clean oven is mostly the result of small habits repeated over time. A quick wipe after heavy use, a baking soda scrub every month or two, and a rack soak every season will keep most ovens looking close to new without hours of scrubbing. Homeowners with a self-cleaning oven can replace the monthly scrub with a pyrolytic cycle a few times a year, using manual cleaning for spot treatment in between.
For homeowners without a self-cleaning oven, the combination of a baking soda paste and a manual steam cycle is enough to handle the most stubborn buildup. The method costs almost nothing, uses products that are already in the home, and avoids the fumes of a commercial oven cleaner. The end result is the same: an oven that heats evenly, smells neutral, and is ready for the next recipe.
Frequently asked questions
How often should I clean my oven if I cook every day?
For households that cook daily, a light wipe after each use and a deeper clean with baking soda once a month will keep grease from building up. If you roast or broil frequently, consider a full cleaning every six to eight weeks, including the racks and the inside of the door glass.
Can I use a self-cleaning oven feature on a regular basis?
Yes, most manufacturers design self-cleaning cycles for regular use, and many owners run them every few months. Avoid running the cycle more than once a month, since the high heat adds wear to the door gasket and consumes significant electricity. If you use the cycle often, inspect the gasket annually for signs of damage.
Is baking soda safe for all oven surfaces?
Baking soda is safe for porcelain enamel, chrome racks, and oven door glass. It should be kept away from aluminum trim, halogen bulbs, and any electrical connection. As with any cleaner, rinse thoroughly with a damp cloth to avoid leaving a white film on the surface.
What is the best way to remove a smoke smell after a spillover?
After cleaning the visible residue, place a dish of water with a few slices of lemon in the oven and heat it to 250 degrees Fahrenheit for 30 minutes. The steam and citrus help neutralize the odor. If the smell remains, the gasket may be holding grease and should be wiped with a baking soda paste, or replaced if it is old and brittle.
Can I leave the racks in during a self-cleaning cycle?
Most manufacturers recommend removing the racks, because the high heat can discolor chrome plating and damage the rack slides. Some newer ovens are designed to keep the racks in place during the cycle; check the owner’s manual for the specific model. As a general rule, take the racks out unless the manual says otherwise.
Will oven cleaner damage the heating element?
Aerosol oven cleaners can leave residue on heating elements that burns on during the next use and produces smoke. To avoid this, apply the cleaner with a cloth instead of spraying, and wipe the heating element with a dry cloth after cleaning the rest of the oven. A baking soda paste is a safer choice for households that want to avoid commercial products.
How do I clean between the glass panels of the door?
Many oven doors can be partially disassembled by removing the screws along the bottom or side of the door, then lifting the outer panel away. The exact process varies by brand, and the owner’s manual should be consulted before any disassembly. Once the panels are separated, clean the inside surfaces with a microfiber cloth and baking soda paste, then reassemble.
What is the difference between catalytic and pyrolytic cleaning?
Catalytic cleaning uses a special enamel coating on the oven walls that breaks down grease at normal cooking temperatures, while pyrolytic cleaning uses a high-heat cycle to burn residue into ash. Catalytic ovens require occasional replacement of the liner, while pyrolytic ovens rely on the high-heat cycle only. Both methods are described in more detail in the Wikipedia self-cleaning oven article, which provides useful background for this point.
Can vinegar damage my oven?
White vinegar is safe for most oven surfaces when used in small amounts and wiped clean. Avoid leaving vinegar on aluminum trim or painted finishes for more than a few minutes, since the acid can cause discoloration. Always rinse vinegar off with a damp cloth and dry the surface before using the oven.
Should I clean a new oven before using it for the first time?
Yes, a new oven often has a light coating of manufacturing oils that can produce smoke and odor during the first use. Run the oven empty at 400 degrees Fahrenheit for 30 minutes with the kitchen ventilated, then wipe the interior with a damp cloth. After that, the oven is ready for normal cooking and the regular cleaning routine described in this guide.
Leave a Reply